A complete guide for Offshift anon users.
Welcome to the Offshift anon User Guide. Whether you’re brand new to Offshift anon or an experienced Shifter, this guide will help you to get hands-on with the platform, Shift between all of its supported assets, and understand how to make the most of its settings and features.
Read on, and you’ll be a master Shifter in no time.
Section One: Getting to Know the Interface
Navigate to app.offshift.io . Or, if you prefer the IPFS-hosted version, visit xft.eth.limo .
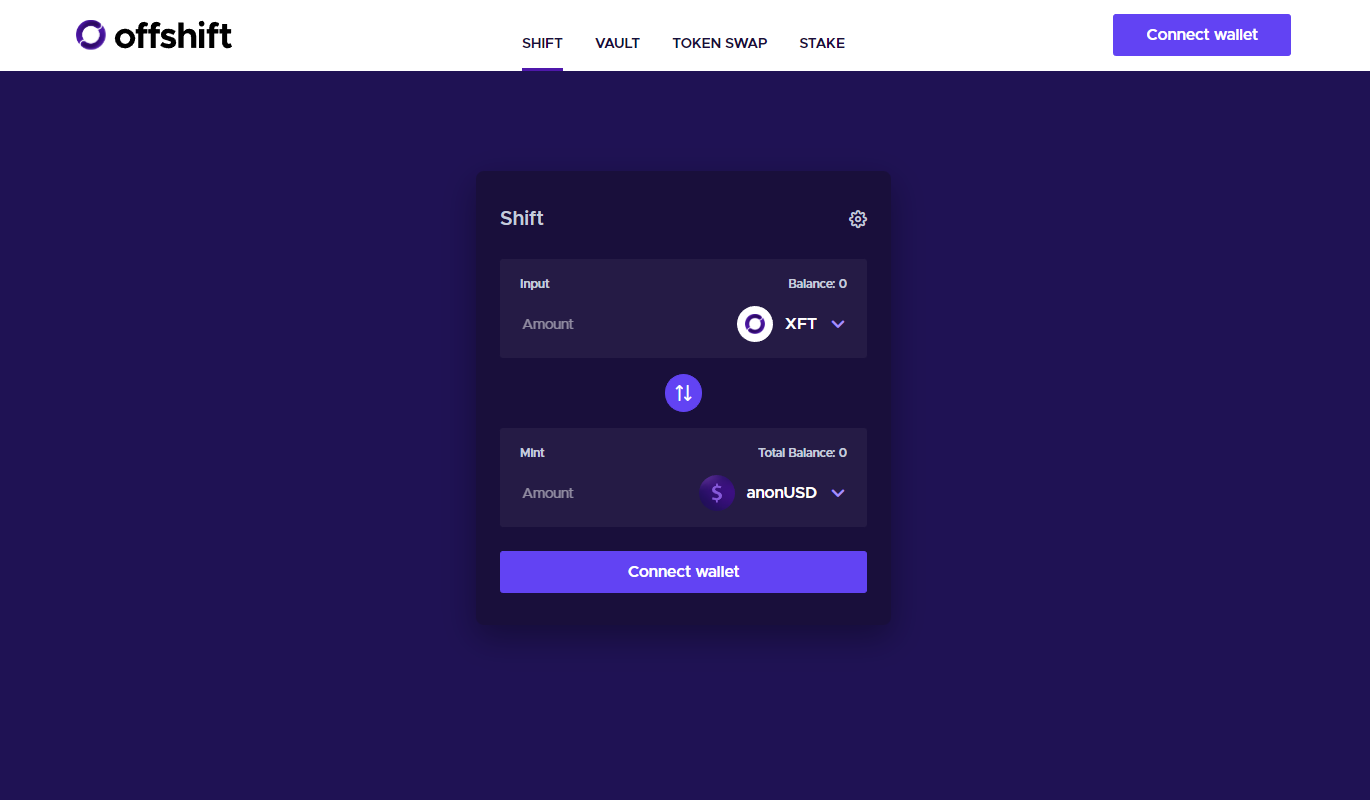
Take a few minutes to familiarize yourself with the user interface.
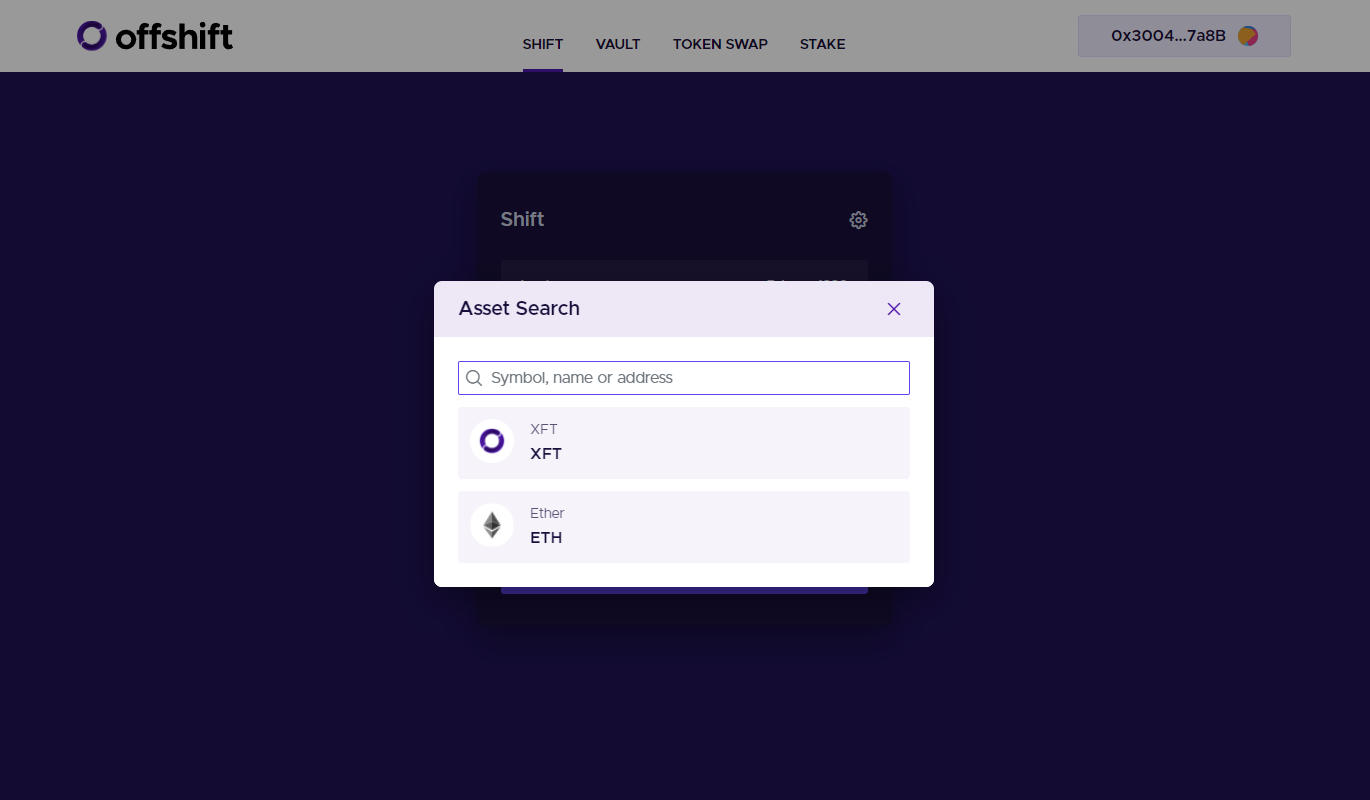
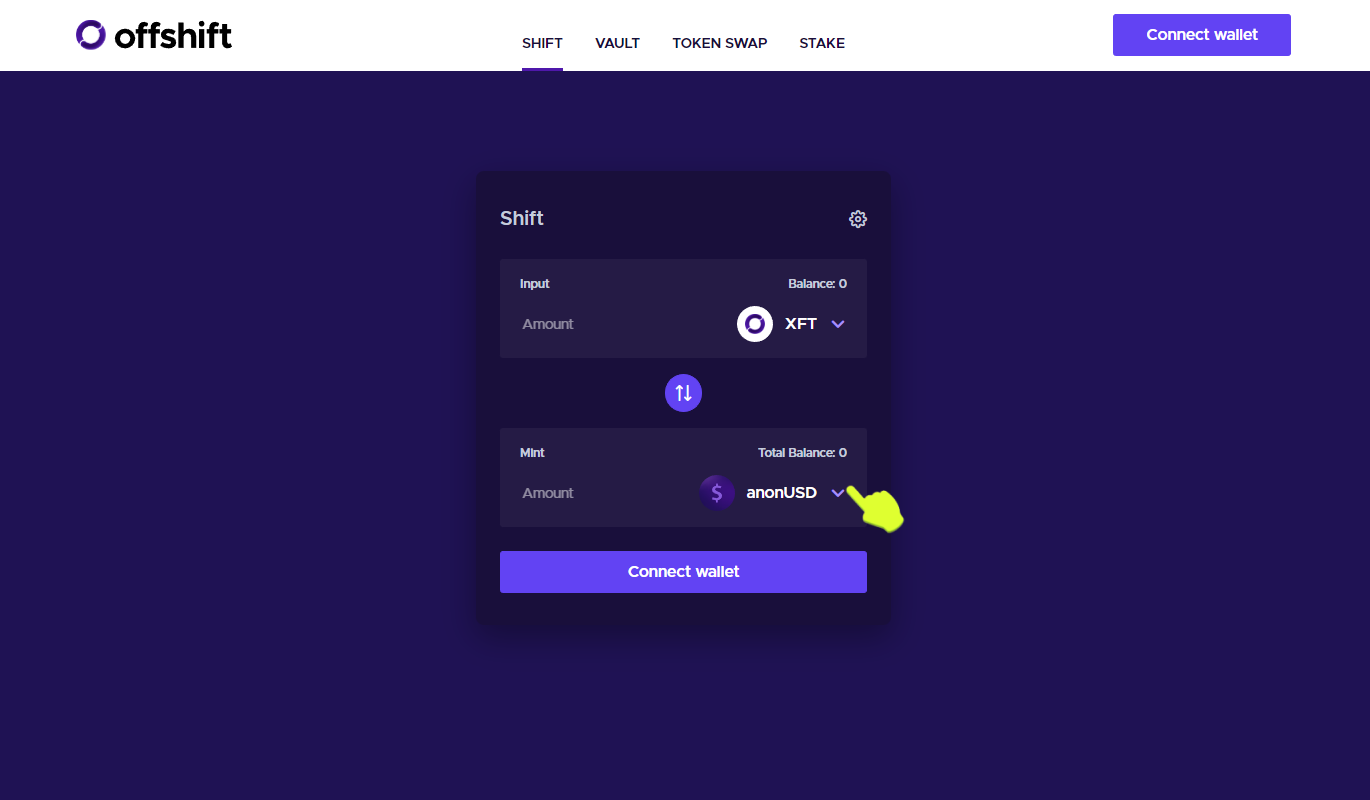
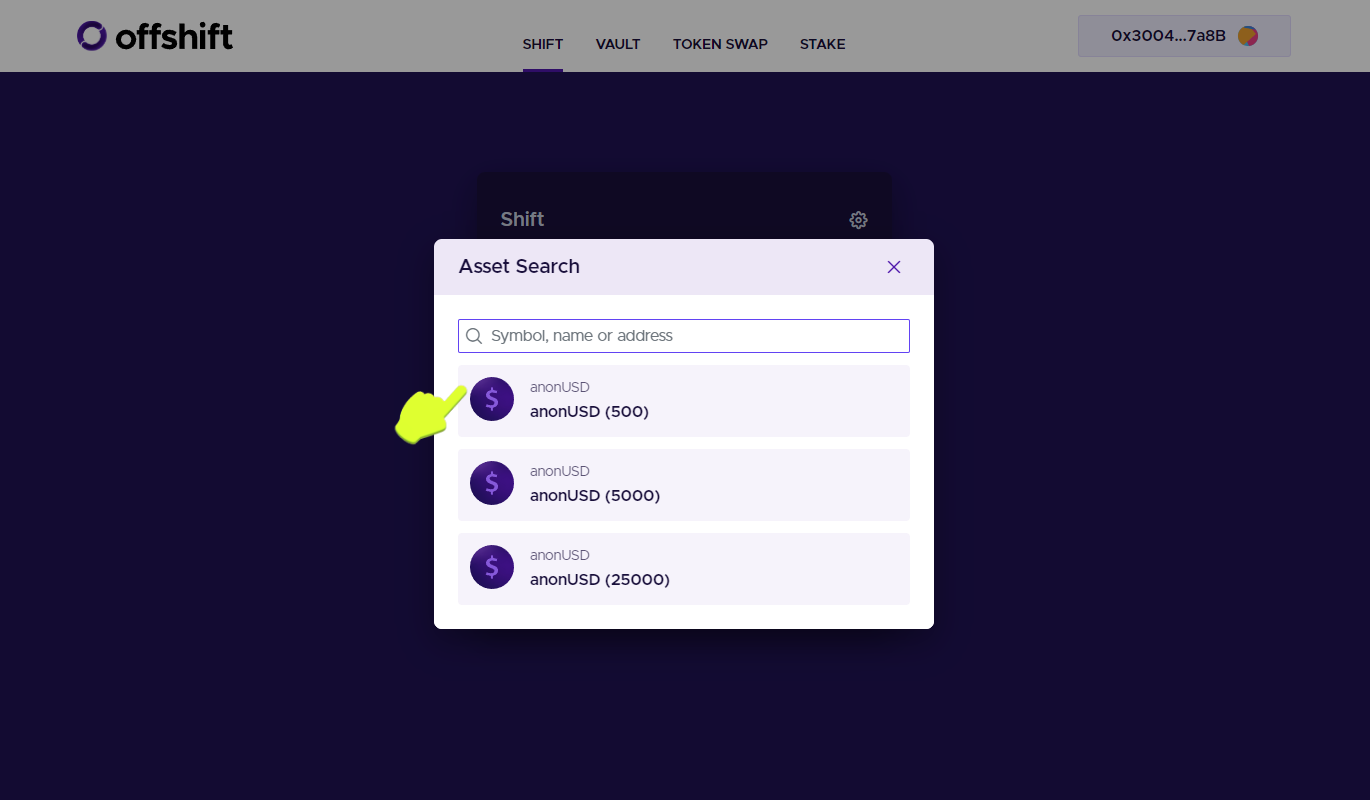
First, click the down arrow next to XFT under Input:
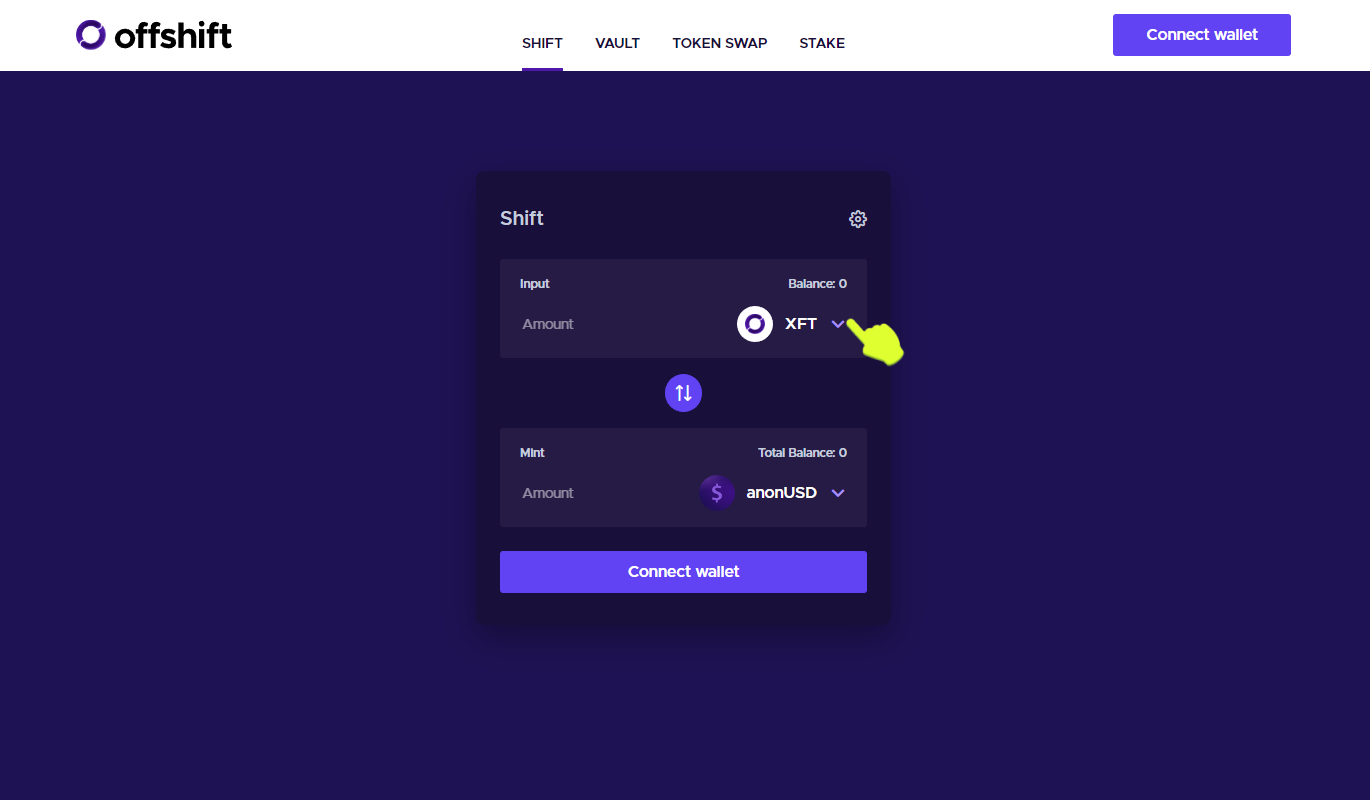
The Asset Search box opens, showing the supported input, or Shift from assets. The platform currently supports Shifts from XFT and ETH. Shifts from ETH are converted to XFT as part of the Shifting transaction.
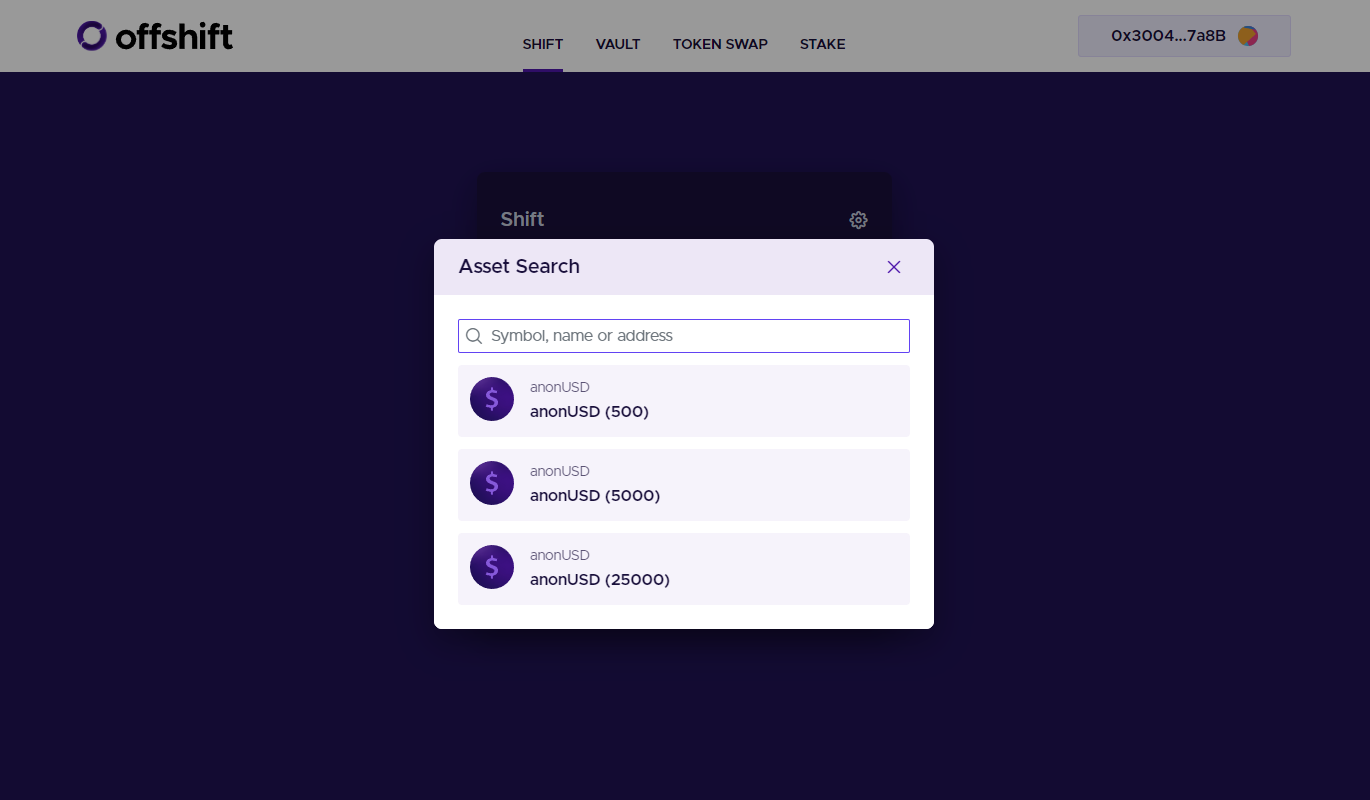
Next, click the down arrow next to anonUSD under Output.
The Asset Search box opens, this time showing the anonUSD denominations you can Shift into.
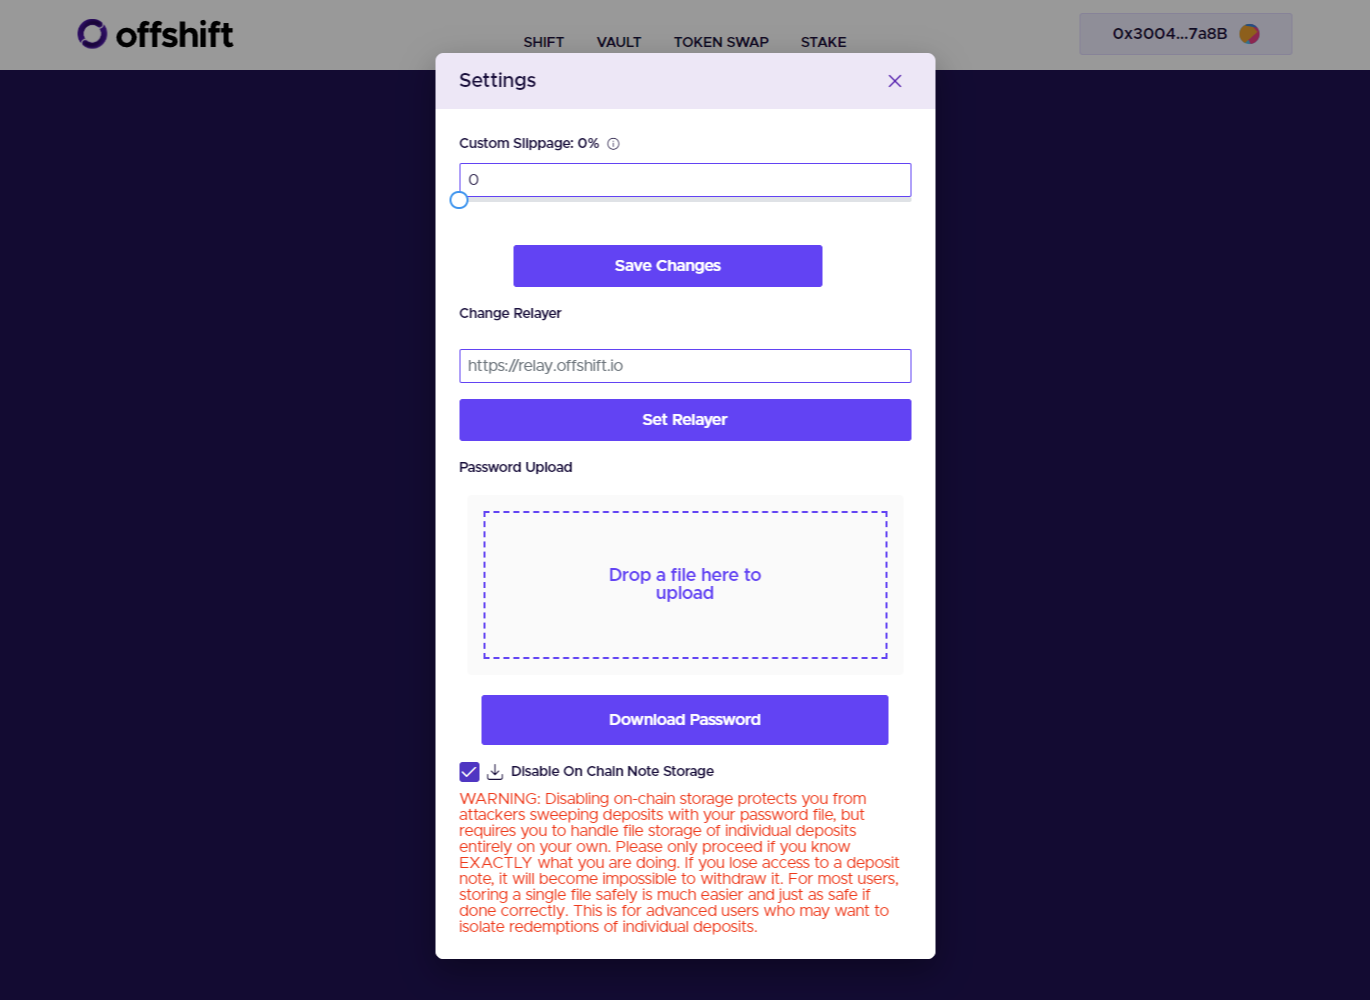
Click the gear icon to open the Settings menu.
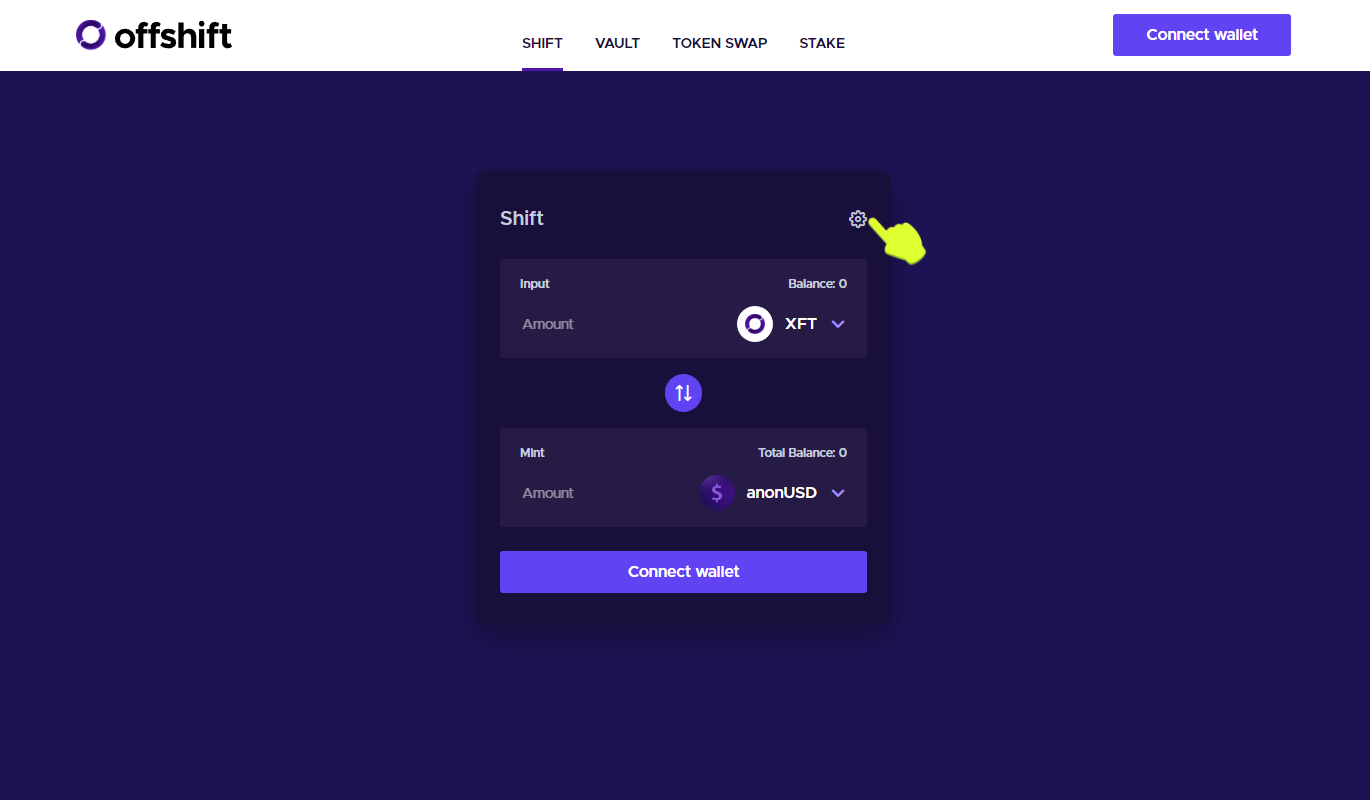
Let’s go over some important settings options.
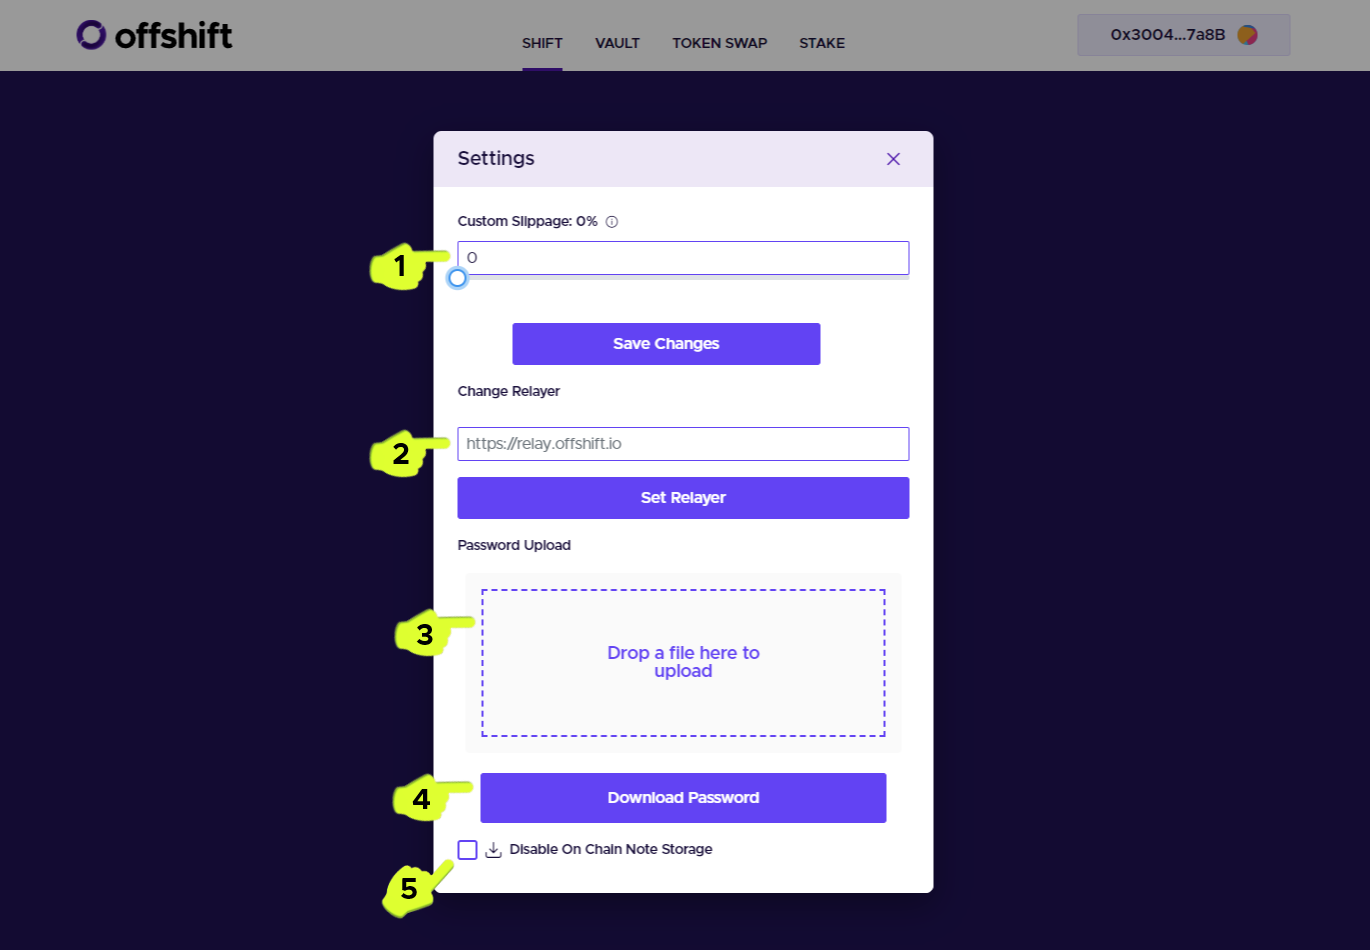
Custom Slippage is only relevant when Shifting from ETH. If you’re not sure what slippage is, you can learn more here . As part of the Shifting transaction, ETH is first routed to Uniswap to be swapped for XFT, and the Custom Slippage setting here applies to the swap. By default, slippage is set at 5%. To adjust, use the slider or enter your desired slippage percentage.
Change Relayer gives the option to use the relayer of your choice by entering a custom endpoint. To use the default relayer, simply leave this box blank.
Password Upload is where you’ll upload a previously generated password in the event your browser cache is cleared after a Shift, or when importing your wallet into a new browser. More on this in the next step.
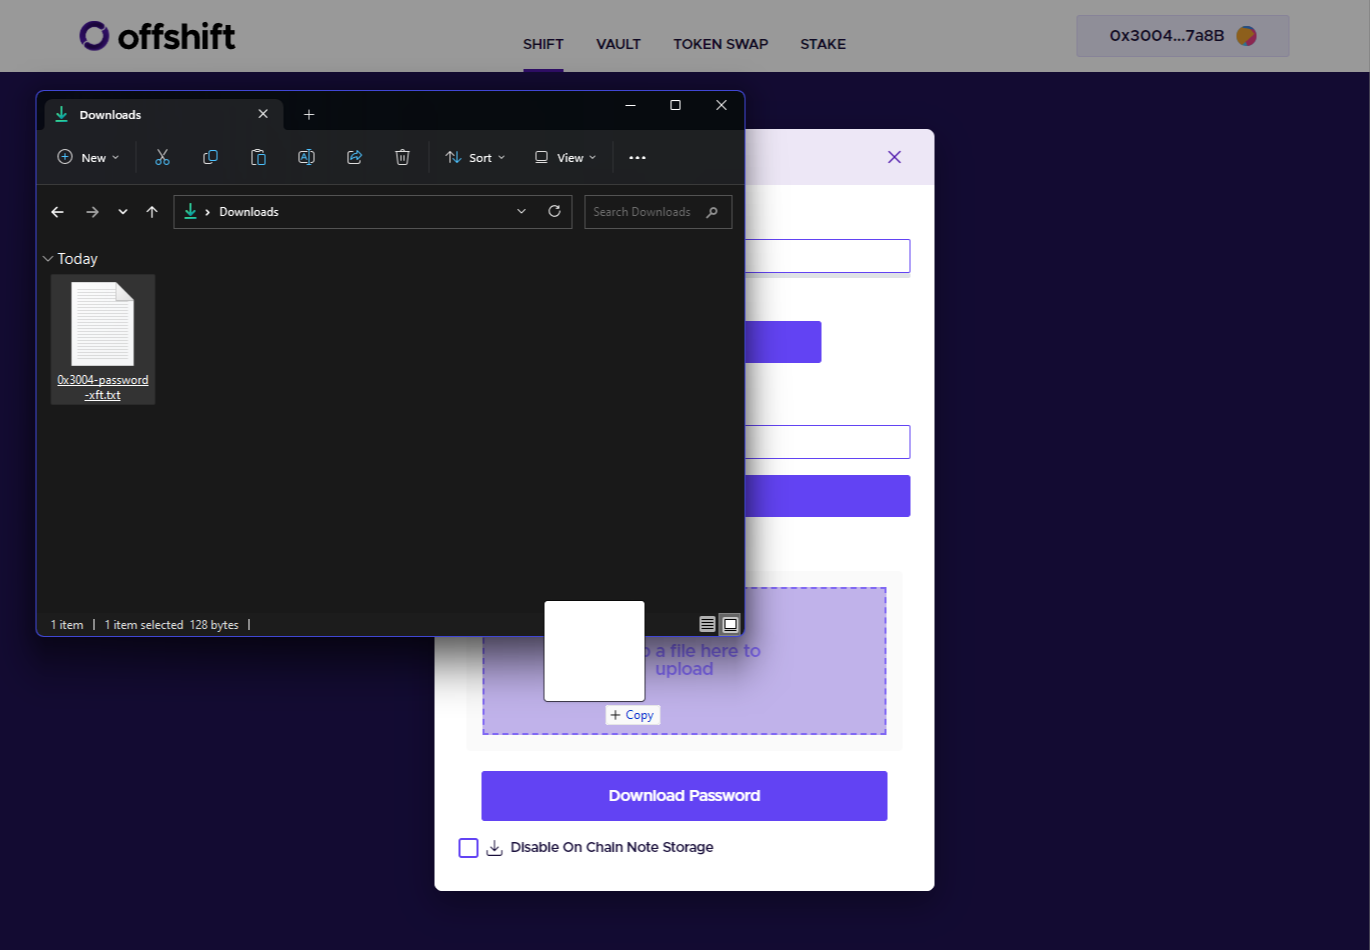
Download Password unsurprisingly downloads a copy of your password. When you Shift, your password is generated and stored in the browser’s local storage. A copy is also downloaded as a text file to your default downloads folder. When your browser’s cache is cleared, so is the password stored there, so be sure to have a copy downloaded and stored somewhere safe. Treat it like you would treat a wallet key.
Disable On-Chain Note Storage is only recommended for advanced users. Read the warning message displayed when this box is checked below.
To import the password for an unspent commitment to a new wallet as mentioned in point three above, open Settings and simply drag the file.
Remember, your password is stored in your browser’s local storage. You can view or spend your commitments at any time by simply connecting the wallet you used to Shift. It’s only necessary to import a password if your browser’s cache is cleared after you Shift.
Now that you’re familiar with the UI, let’s Shift.
Section Two: Depositing and Burning XFT
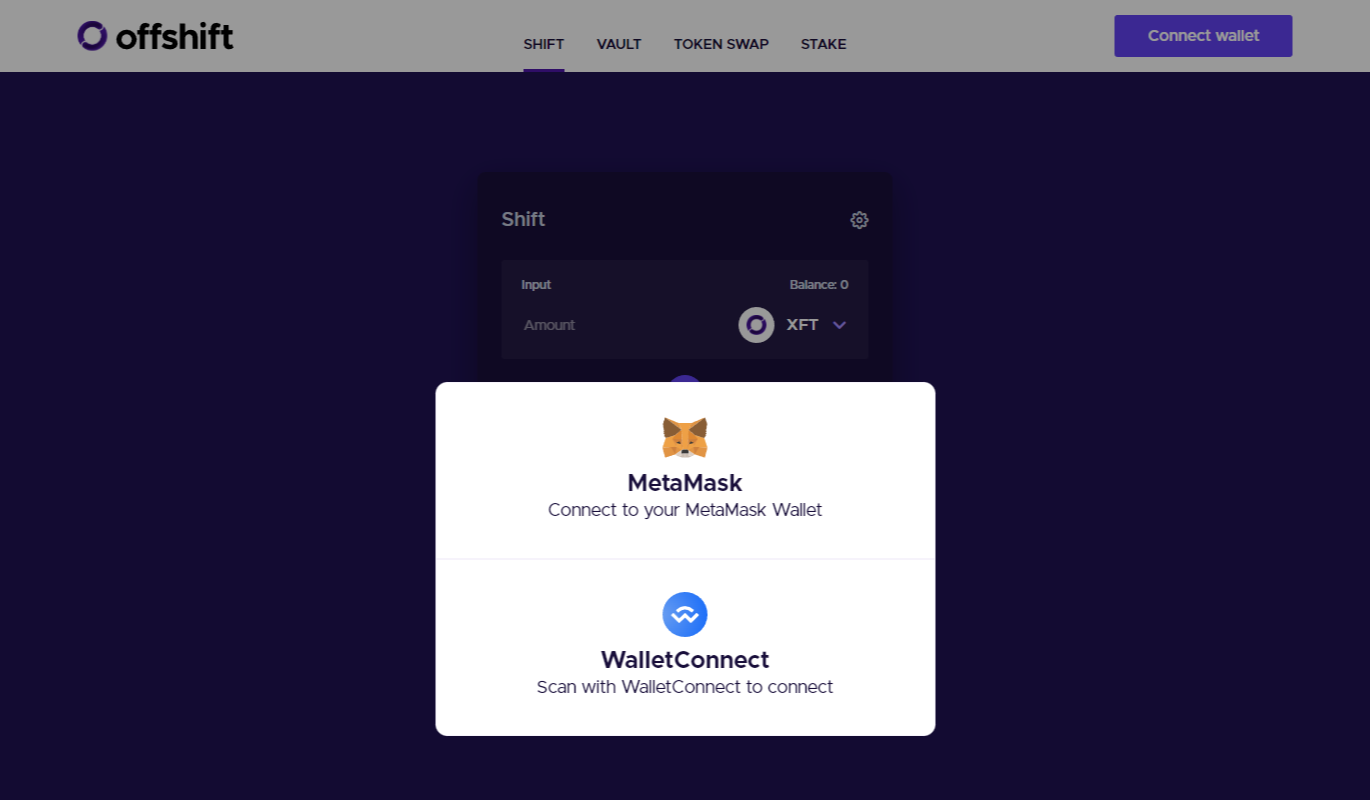
1. Click Connect Wallet and select MetaMask or WalletConnect. For this guide we’ll use MetaMask.
2. Open MetaMask and ensure that the connected wallet is the one you want to use.
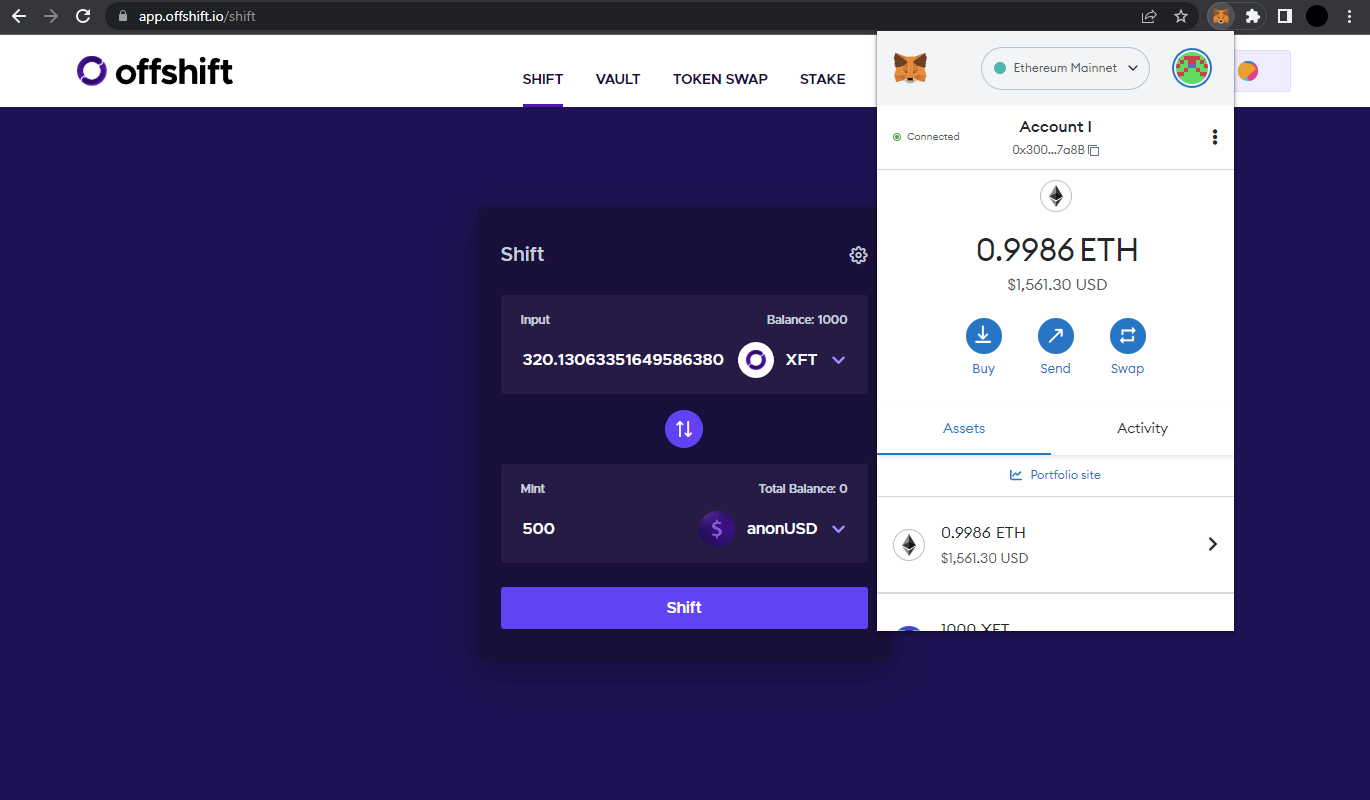
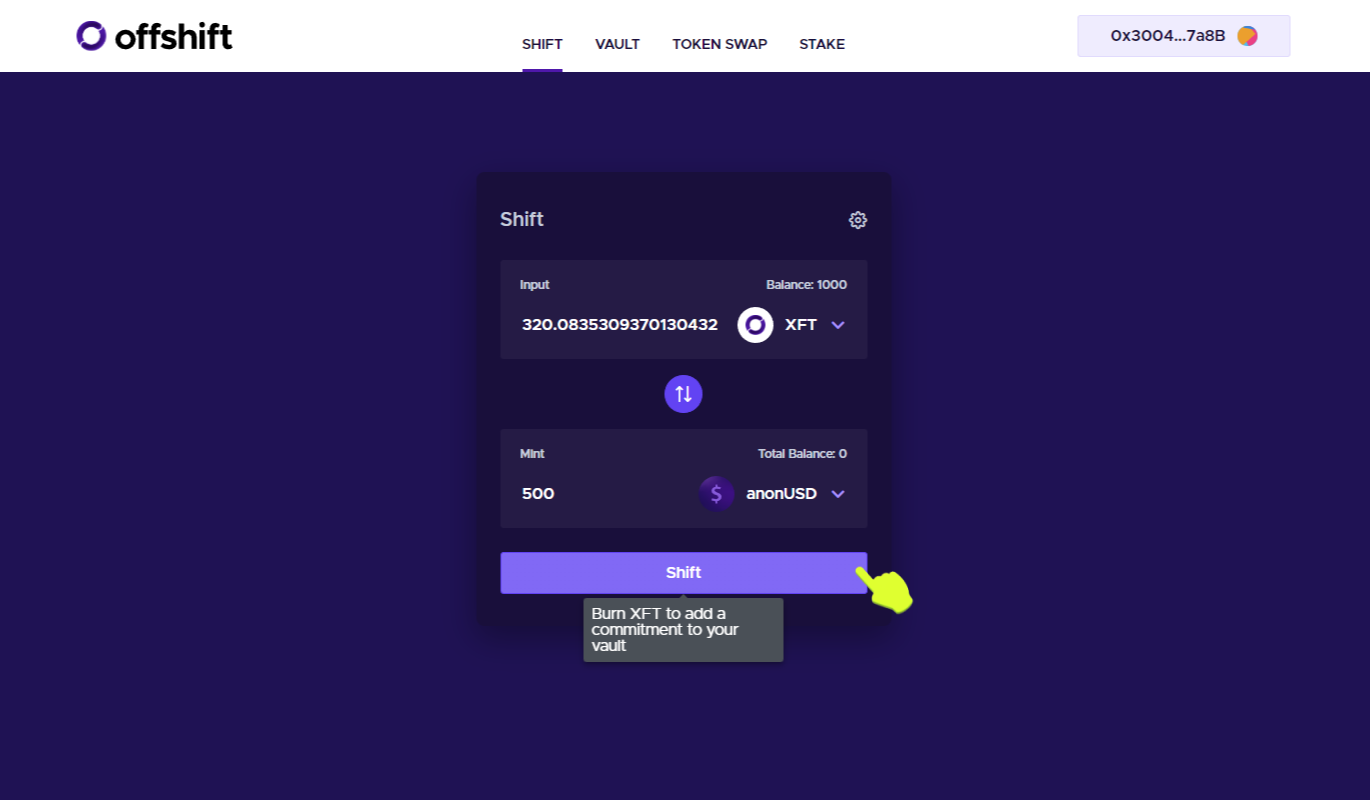
3. On the Shift tab, select your Input Asset and Output denomination.
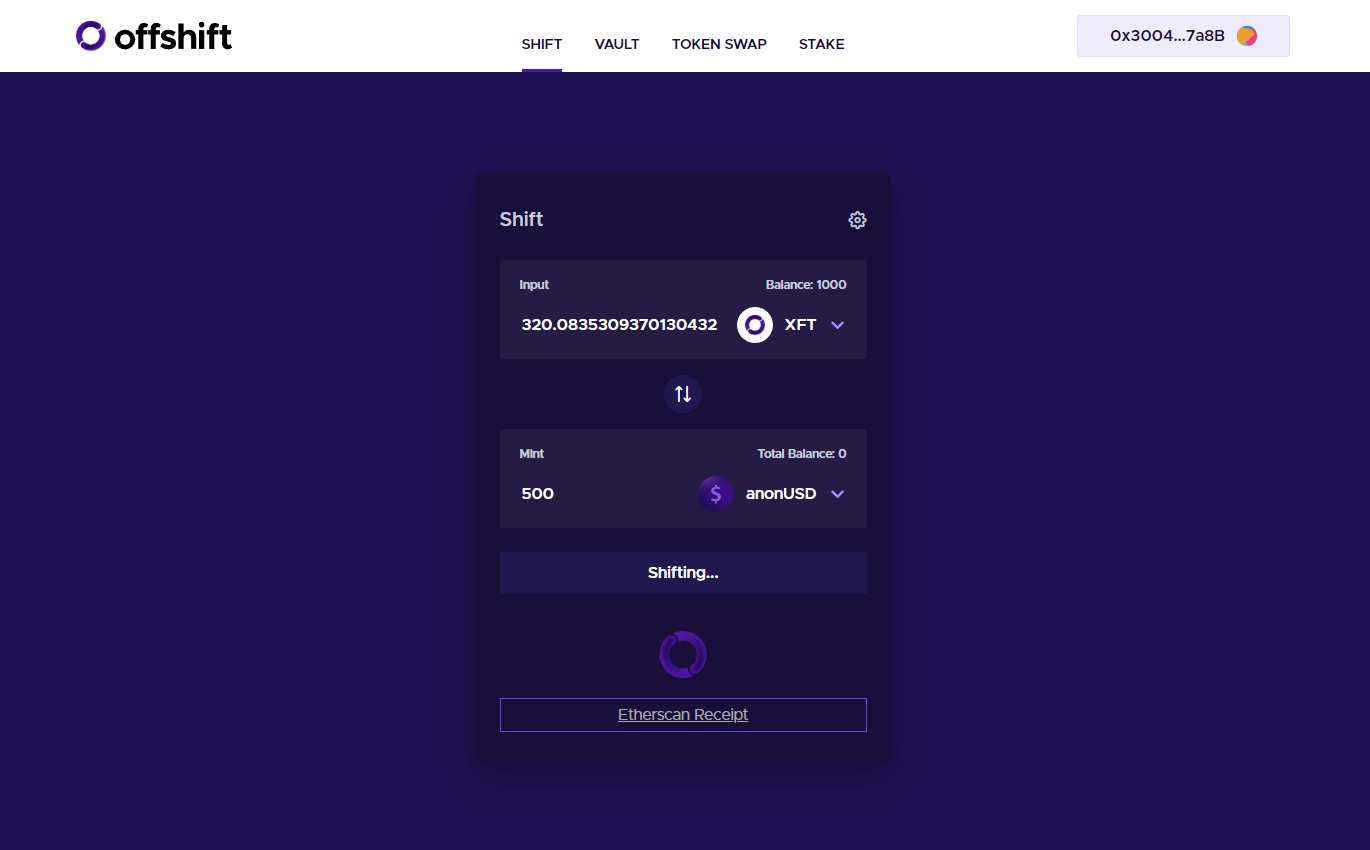
4. If your input is XFT, click Shift.
If your input is ETH, click Swap Router.
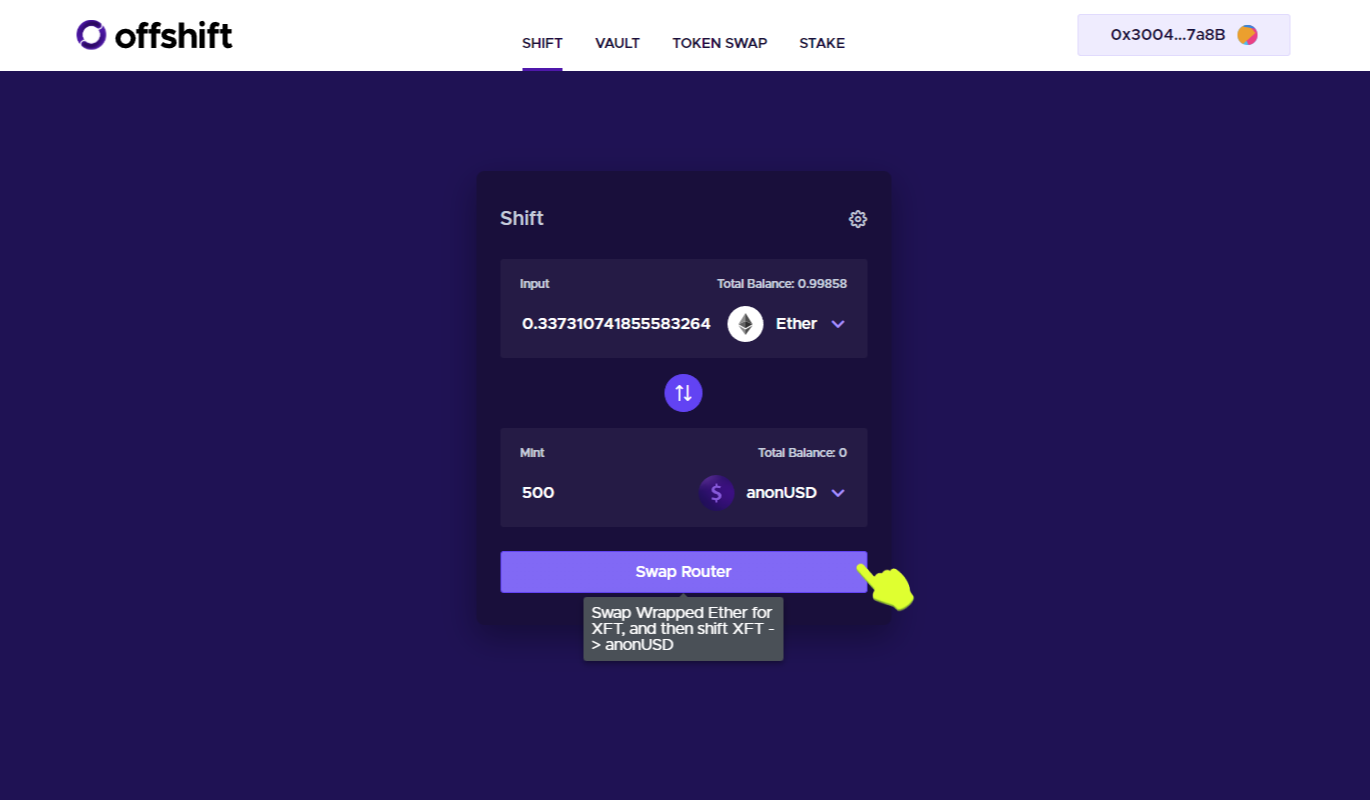
Your password will be generated and stored locally, and MetaMask will open.
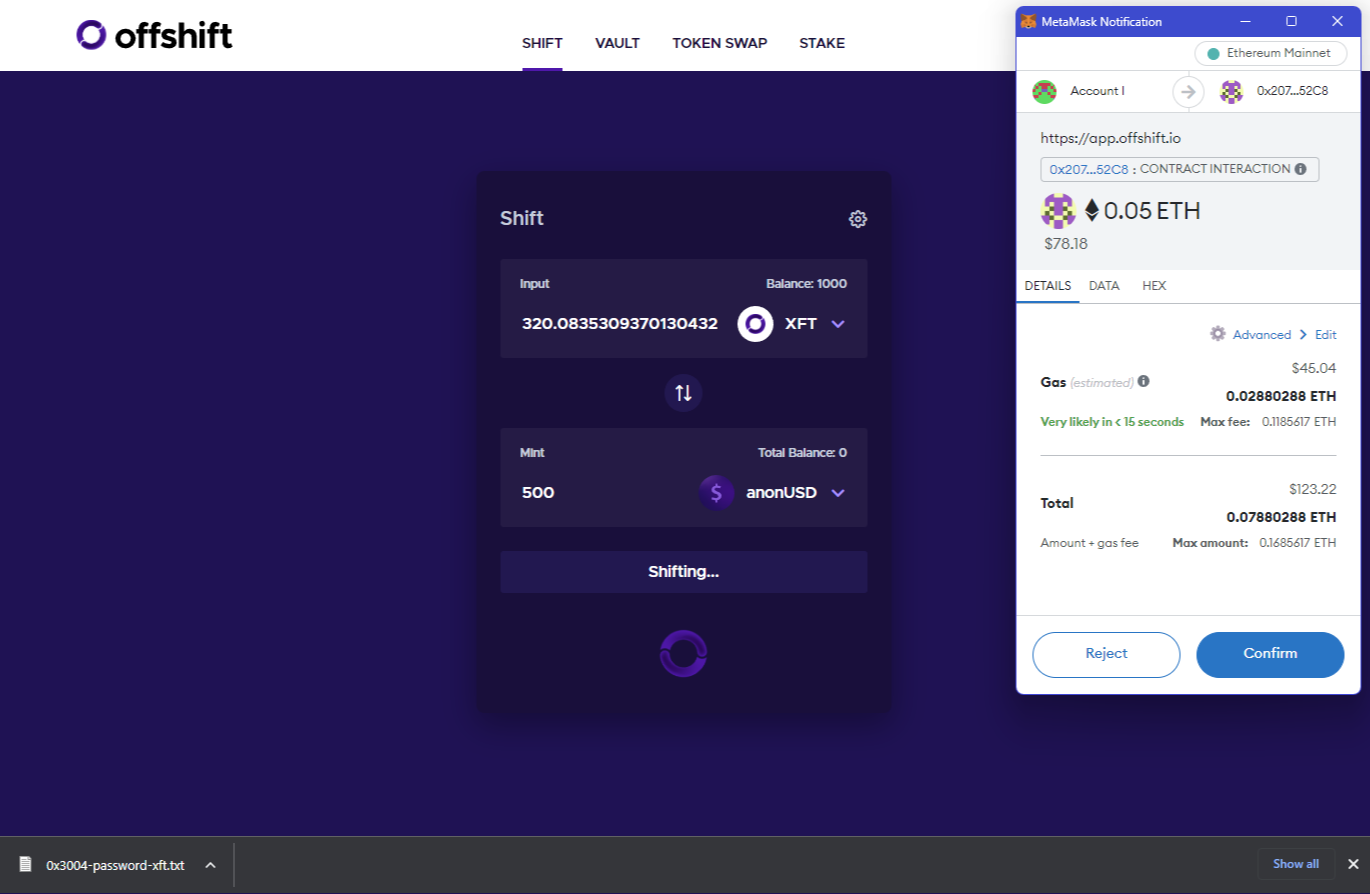
Your Shifting transaction will send XFT to be burned, and also deposit 0.05 ETH that the relayer will return to you when you mint your anonUSD. The ETH deposit’s role is to provide you with gas for transacting with your anonUSD once you’ve minted it.
5. Confirm the contract interaction in MetaMask and ensure that your password is somewhere safe.
After confirming in MetaMask, the Etherscan transaction detail is viewable via the Etherscan Receipt link displayed on the dashboard.
6. Open the Vault tab to view your commitment.
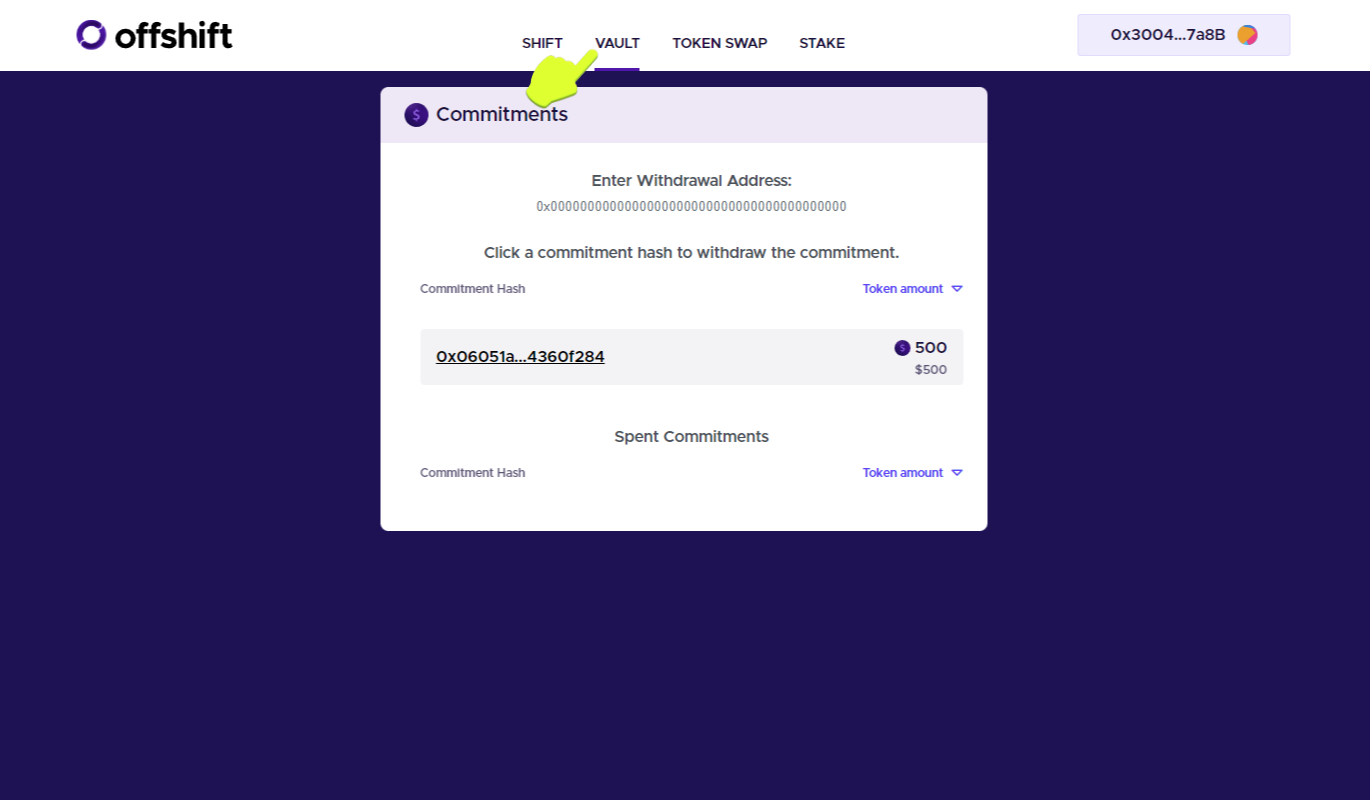
At this point, XFT has been burned, and a representation of its value exists as an encrypted note. Only the owner of the note (that’s you) knows whether said note has been redeemed for anonUSD, and to which address the anonUSD has been sent once it’s minted.
Section Three: Minting anonUSD
1. With the wallet you used in section two connected, navigate to the Vault tab. Paste the address of the wallet where you want to receive your anonUSD in the field under Enter Withdrawal Address. Then click the Commitment Hash you want to redeem.
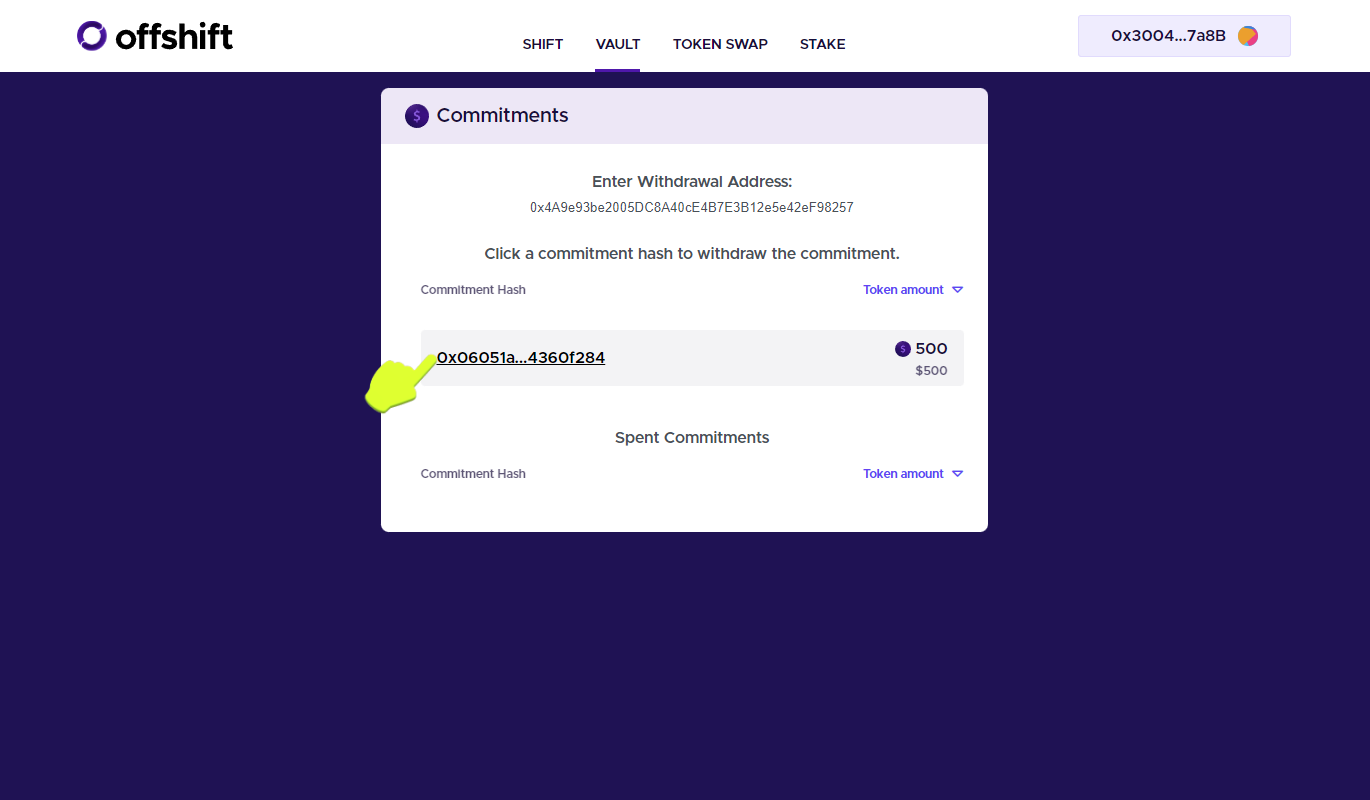
The interface will reflect Withdrawing… status.

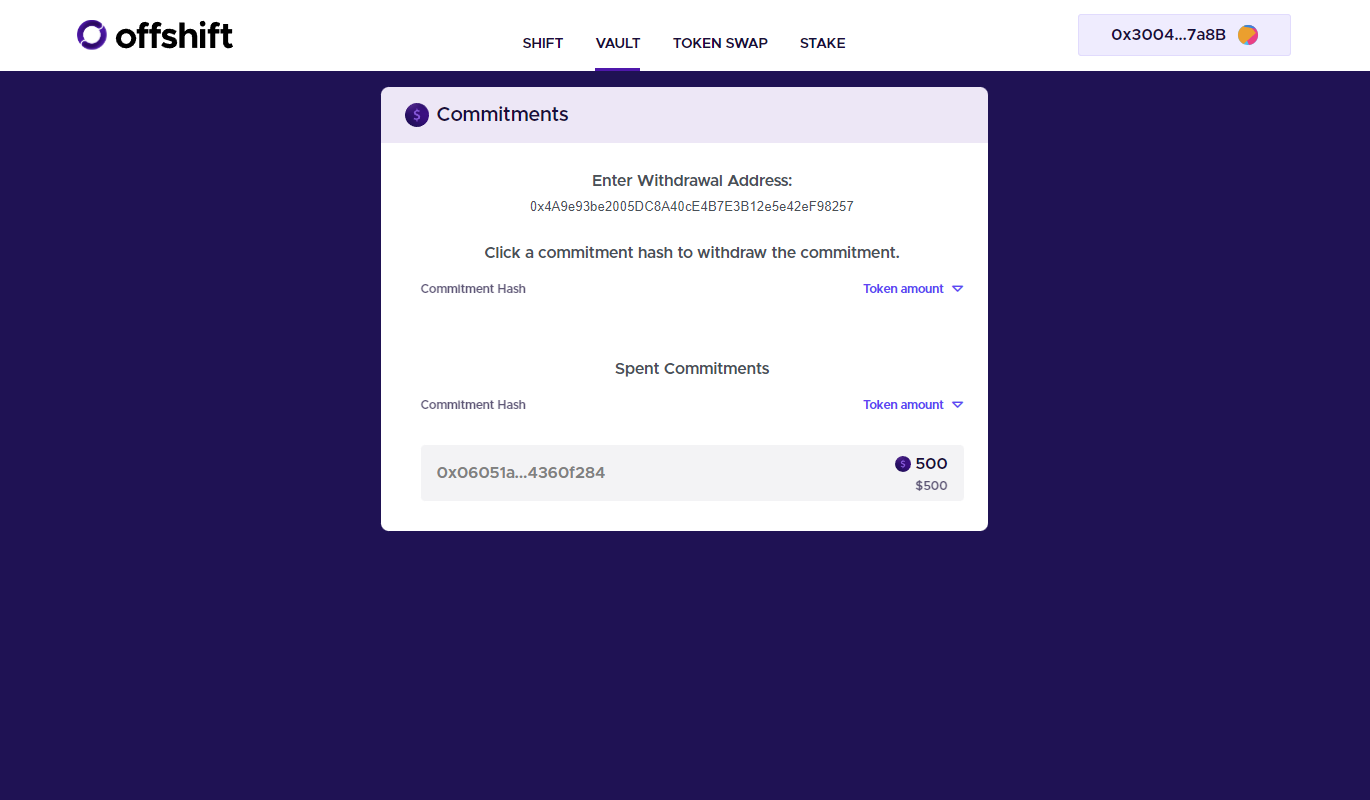
Once withdrawn, the commitment shows under Spent Commitments.
2. Switch to the receiving wallet in MetaMask and add anonUSD by contract address: 0x5a7e6c8204a1359db9aacab7ba5fc309b7981efd
Alternatively, you can navigate to CoinmarketCap’s anonUSD page and click the MetaMask icon.
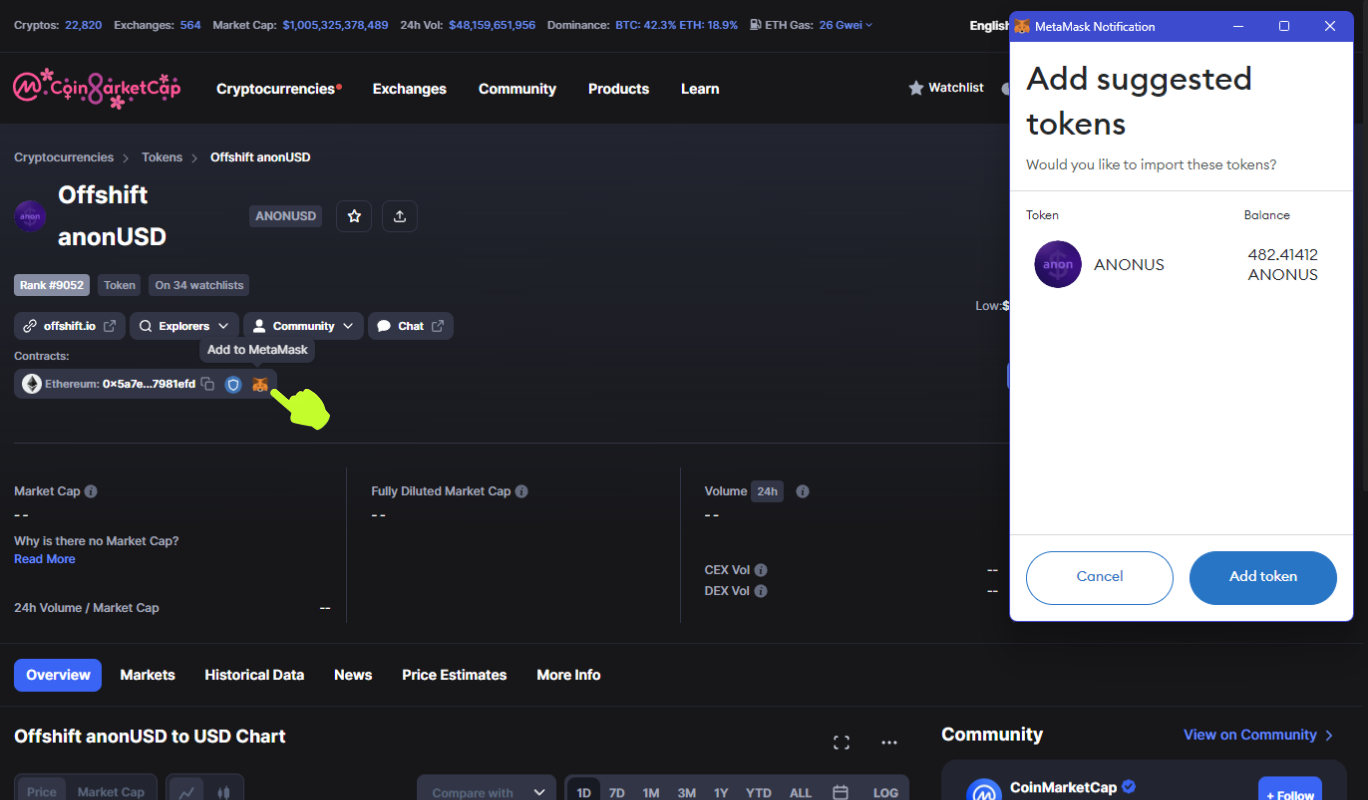
Your wallet now shows your anonUSD, minus the fee you paid to the relayer for withdrawing your commitment (around 18 anonUSD in the example), as well as the 0.05 ETH you deposited with your Shift.
Section Four: Simple Shifting from anonUSD to XFT
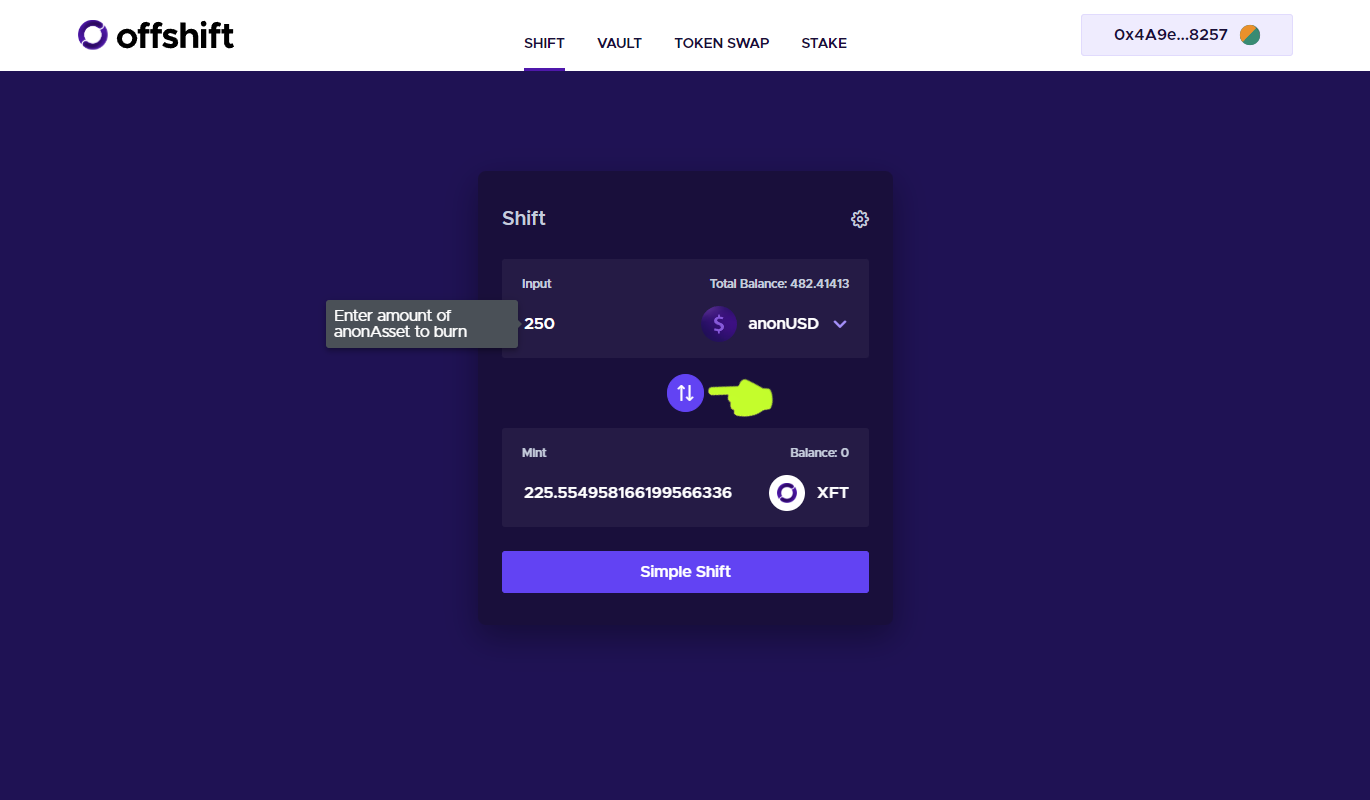
In the event you want to Shift from anonUSD back to XFT, navigate back to the dashboard.
1. Click the directional arrows in the middle of the interface to toggle anonUSD to the Input box, and enter the amount of anonUSD you want to Shift. The amount of XFT you’ll receive will autofill.
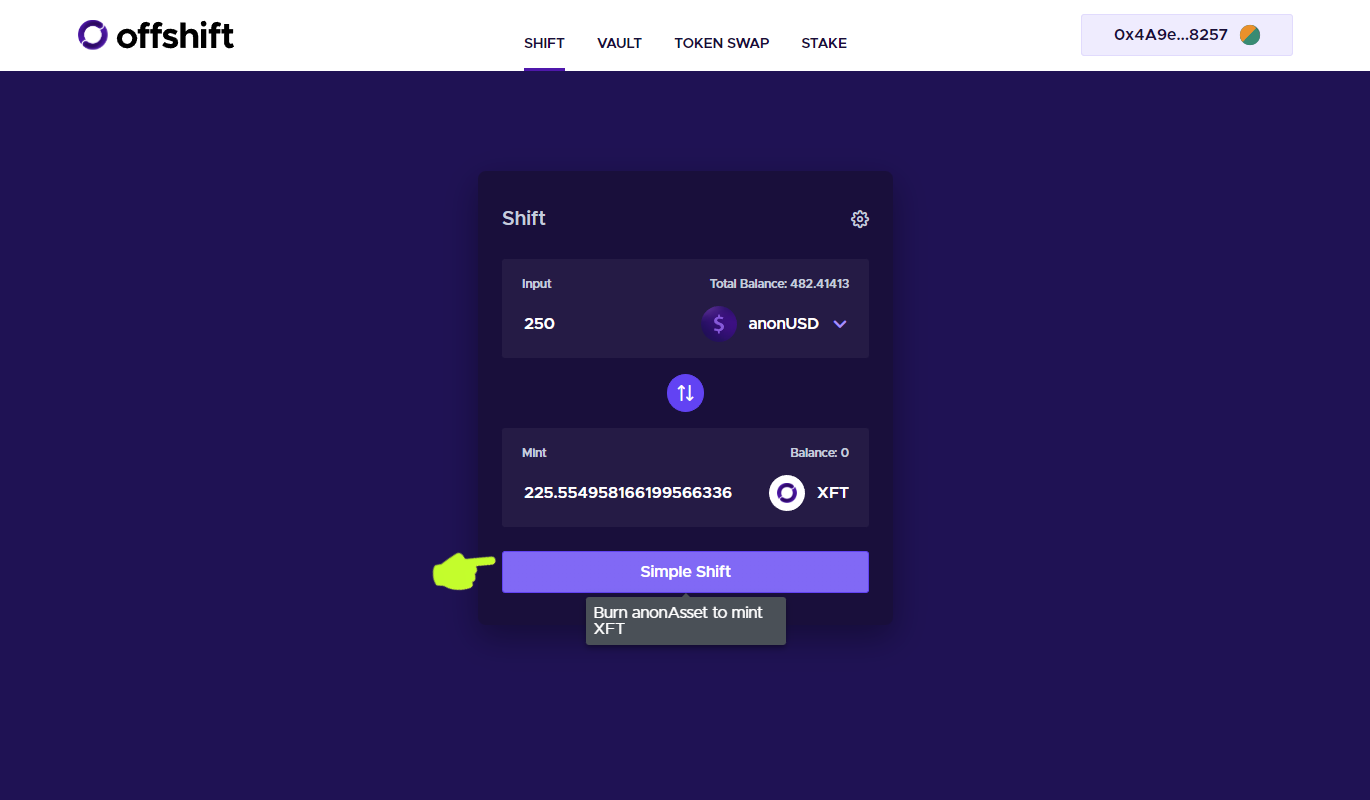
2. Click Simple Shift.
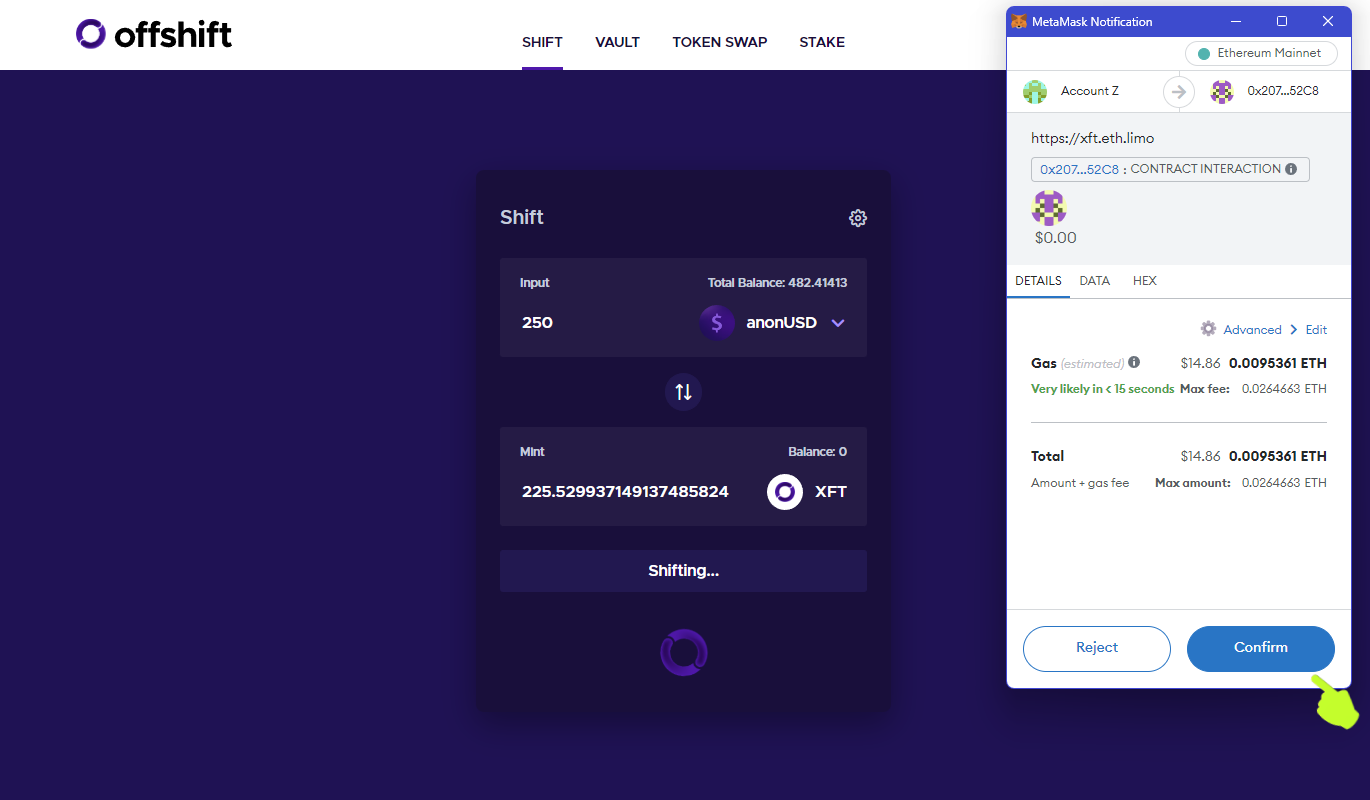
3. When MetaMask opens, click Confirm.
4. If you don’t already have XFT added to MetaMask, navigate to
CoinmarketCap’s XFT page
and click the MetaMask icon, or add by contract address: 0x76bc677d444f1e9d57daf5187ee2b7dc852745ae
With the Simple Shift confirmed, your wallet will show a balance of XFT.

If you have further questions or inquires about using Offshift anon, don’t hesitate to reach out to the Offshift team and community leads directly in Offshift’s official Telegram .