here) or through the market on Uniswap.
1. With anonUSD and ETH in your wallet, navigate to Offshift’s Uniswap Staking Page and connect your wallet.
Once connected, familiarize yourself with the dashboard. Note you’re on the Stake tab. There’s a wallet icon in the upper right, which we’ll get to in step five. Let’s define the metrics you see listed -
Unclaimed Rewards - the number of XFT yet to be distributed in the period.
End of Incentive - the time and date the current period ends.
Estimated APR - An estimation of return, expressed as (return value/position value)
.
2. In the anonUSD box, enter the number of anonUSD tokens you want to provide to the pool, and the Ether amount will autofill. Click Add Liquidity.
3. MetaMask will open and ask you to Give permission to access your anonUSD, the first of two transactions you’ll need to approve. Click Confirm.
After confirming in MetaMask, the Etherscan transaction detail is viewable via the Etherscan Receipt link displayed on the dashboard.
4. When the first transaction is confirmed by the network, MetaMask will open for approval of an Add Liquidity transaction. Click Confirm.
When the Add Liquidity transaction is confirmed by the network, you’re staking!
5. You can view your accrued rewards or withdraw your position at any time by clicking the wallet icon in the upper right.
The Staked Tokens menu opens, where you’ll find your Token ID, a link to view your position on Uniswap, and the amount of XFT rewards you’ve accrued.
6. Rewards are withdrawn when you withdraw your position from the staking contract. When you’re ready to claim rewards and withdraw, select your token and click Withdraw.
7. Confirm in MetaMask.
8. With the withdrawal confirmed by the network and your Positions NFT back in your wallet, navigate to the Uniswap Pool Management Page. Connect your wallet, then click your position to open the position detail.
9. When the position detail page opens, lick Remove Liquidity.
10. Using the slider or buttons, select the amount of liquidity you’d like to remove, then click Remove.
11. A Uniswap confirmation will pop up. Once again click Remove.
12. Confirm in Metamask.
When the transaction confirms, MetaMask shows the pooled anonUSD and ETH back in your wallet, along with the XFT you earned from rewards.
That concludes the Uniswap walkthrough. If you have any questions or run into any issues, please reach out in the official Offshift Telegram, where someone from the team or community will be happy to assist. For a walkthrough of SushiSwap staking, read on.
*Reward Math - Rewards are allocated according to a staker’s share of total SLP staked. A staker’s reward rate per block =
xftPerBlock
xShare
; whereShare
=Stakers
(yourAddress
) /balanceOf
rewardsContract
.
This guide assumes you have XFT and ETH in your wallet. If you don’t, you can acquire XFT on Uniswap or SushiSwap.
1. With XFT and ETH in your wallet, navigate to the SushiSwap Add Liquidity page. Connect your wallet, and add liquidity into the XFT/ETH pool. For help with this step, refer to How to add tokens to SushiSwap Exchange as an LP in SushiSwap’s docs.
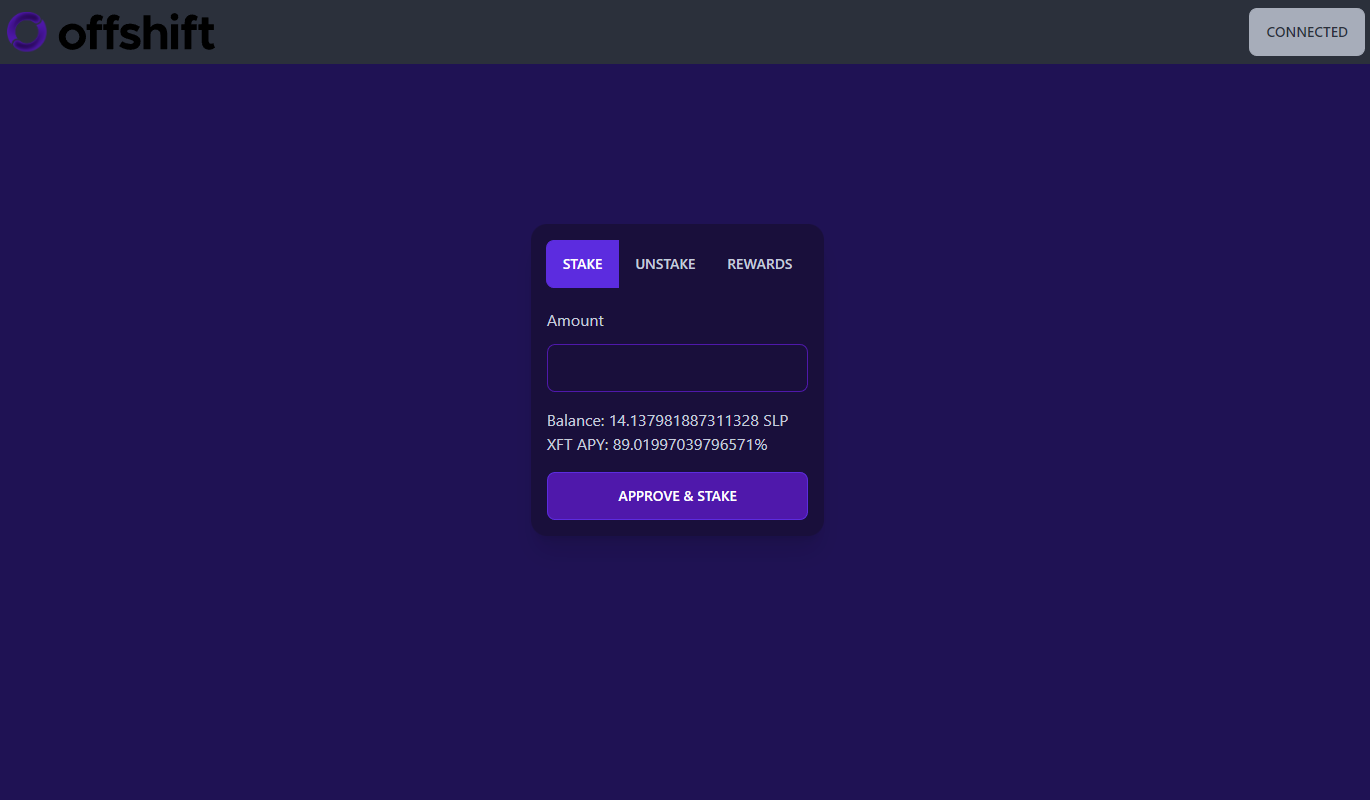
2. Once you’ve completed step one, you’ll have SushiSwap LP Tokens (SLP) in your wallet. Navigate to Offshift’s SushiSwap LP Staking Page and connect your wallet.
Familiarize yourself with the dashboard. There are three tabs - Stake, Unstake and Rewards. The Stake page shows your SLP Balance and an estimated APR, expressed as (return value/position value)
.
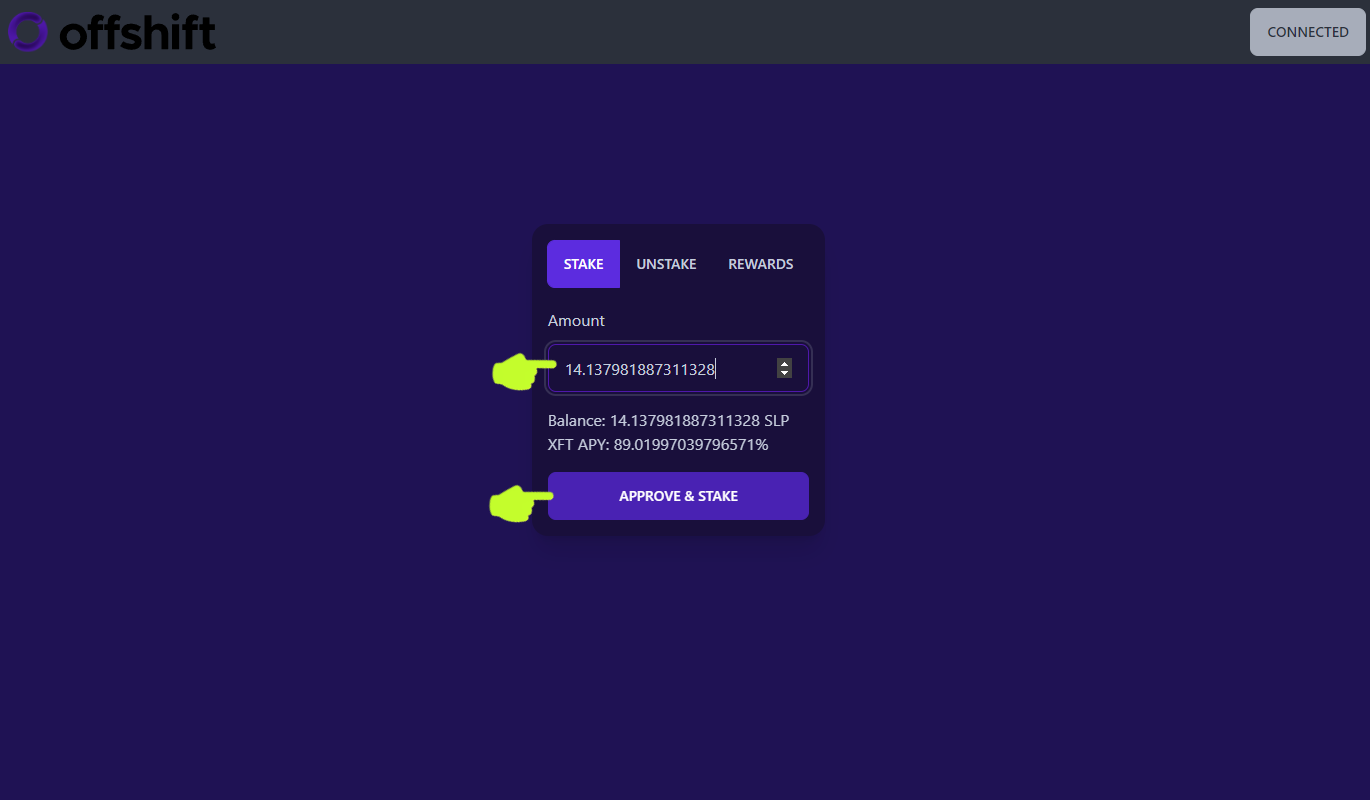
3. In the Amount box, enter the number of SLP tokens you’d like to stake (usually the full balance), then click Approve & Stake.
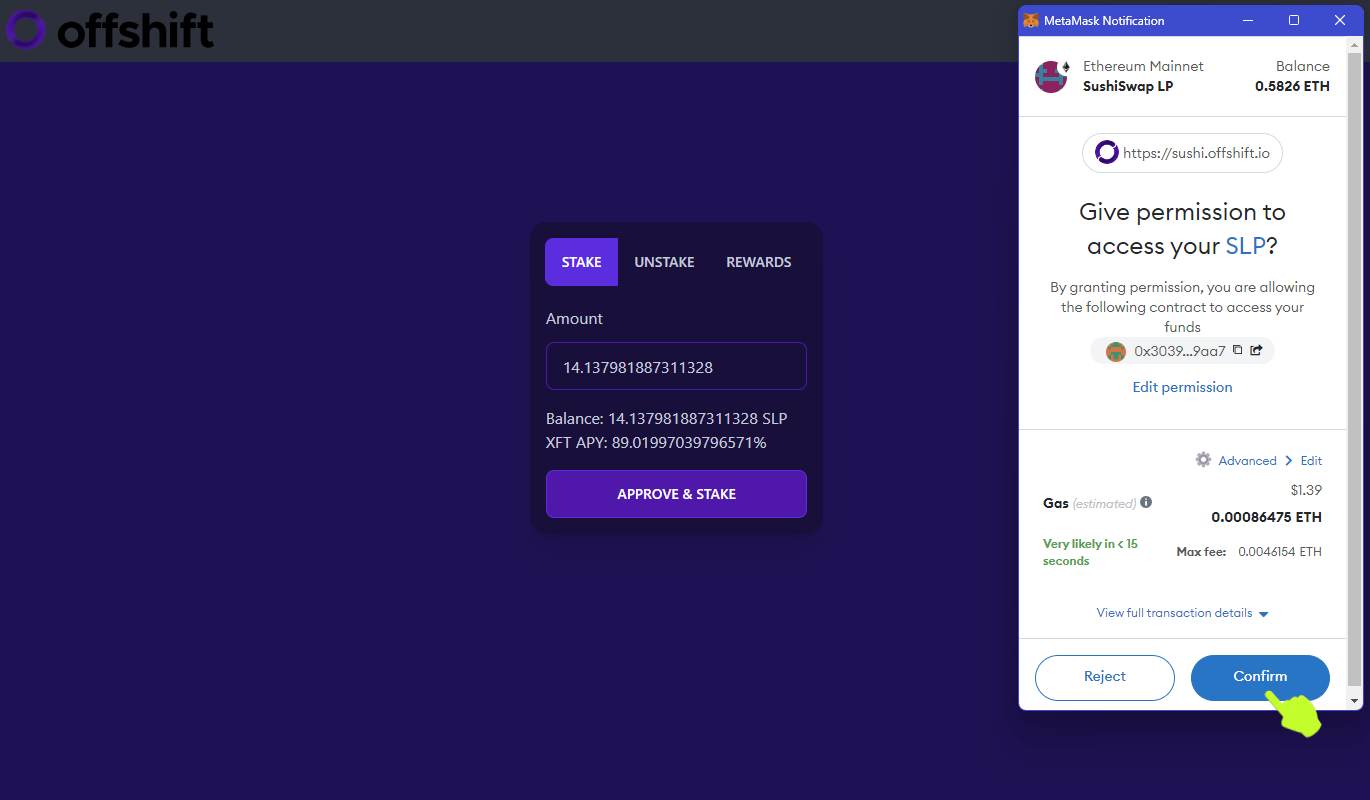
4. MetaMask will open and ask you to Give permission to access your SLP, the first of two transactions you’ll need to approve. Click Confirm.
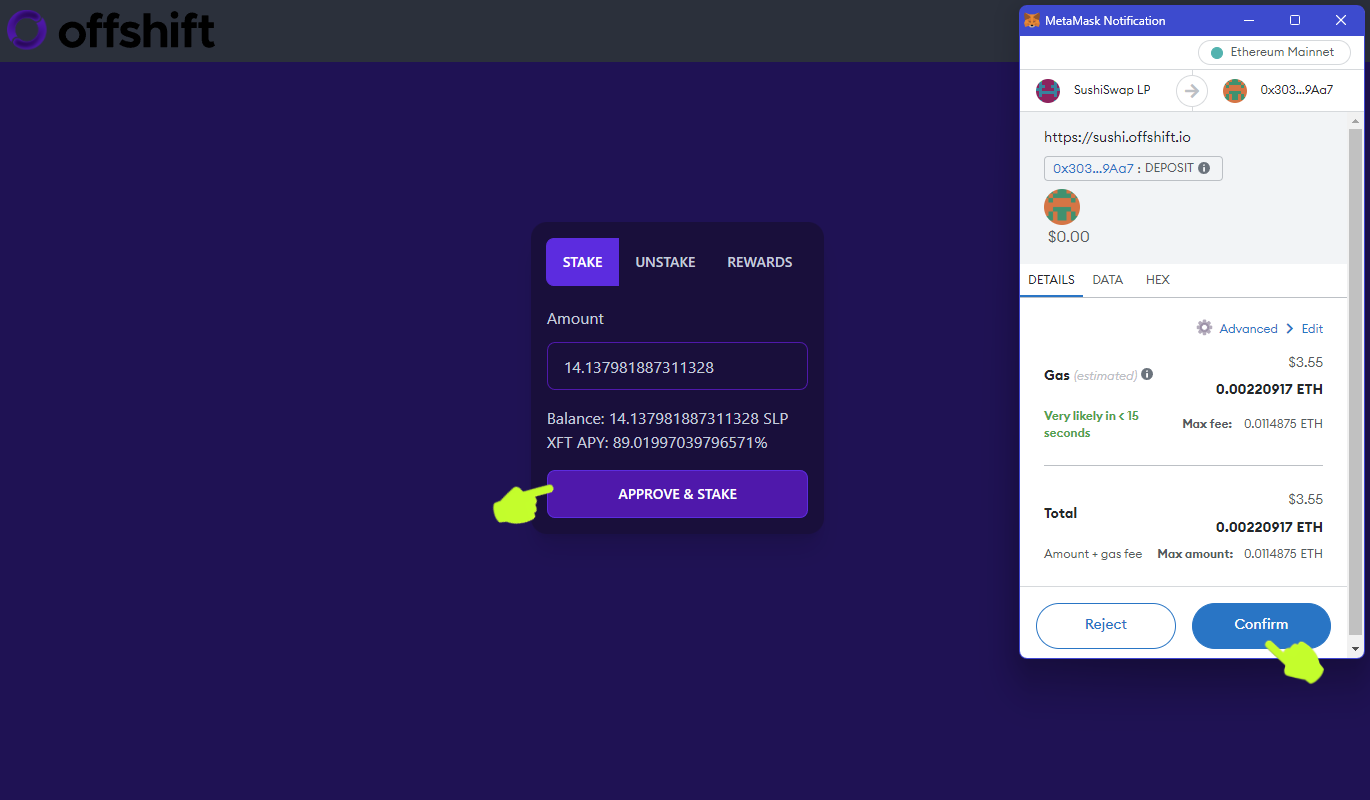
5. When the first transaction is confirmed by the network, click Approve & Stake once more. MetaMask will open for approval of an Add Liquidity transaction. Click Confirm.
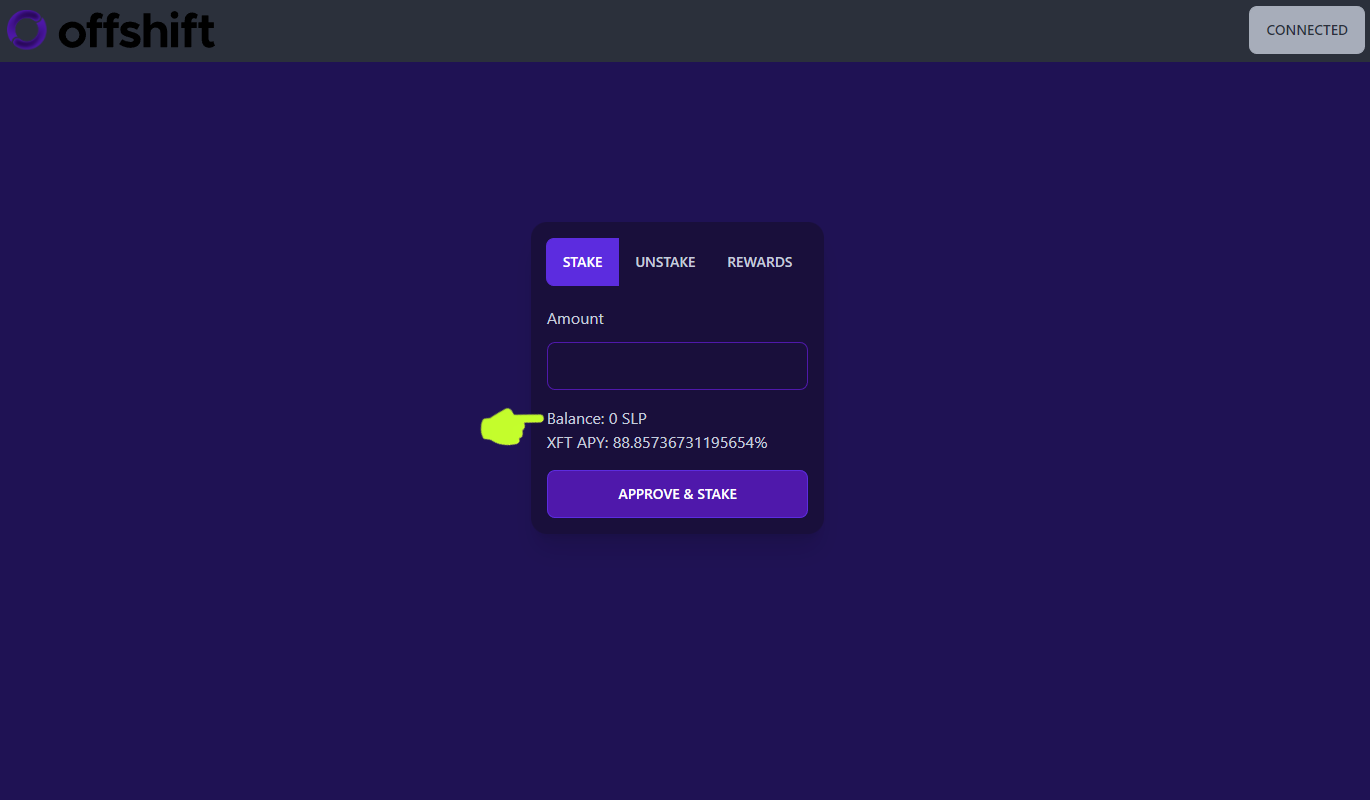
When the second transaction is confirmed by the network, you’re staking! Your SLP balance should now read zero on the dashboard (you may need to refresh the page depending on your browser).
6. Navigate to the Rewards tab. This is where you can view the amount of rewards you’ve accrued in real time. Accrued rewards can be harvested at any time, so let’s try it out. Click Harvest.
7. Metamask will open for approval of the Harvest transaction. Click Confirm. When the transaction is confirmed by the network, your Available XFT Rewards should read zero, and the XFT balance in your wallet should reflect the addition of the harvested XFT.
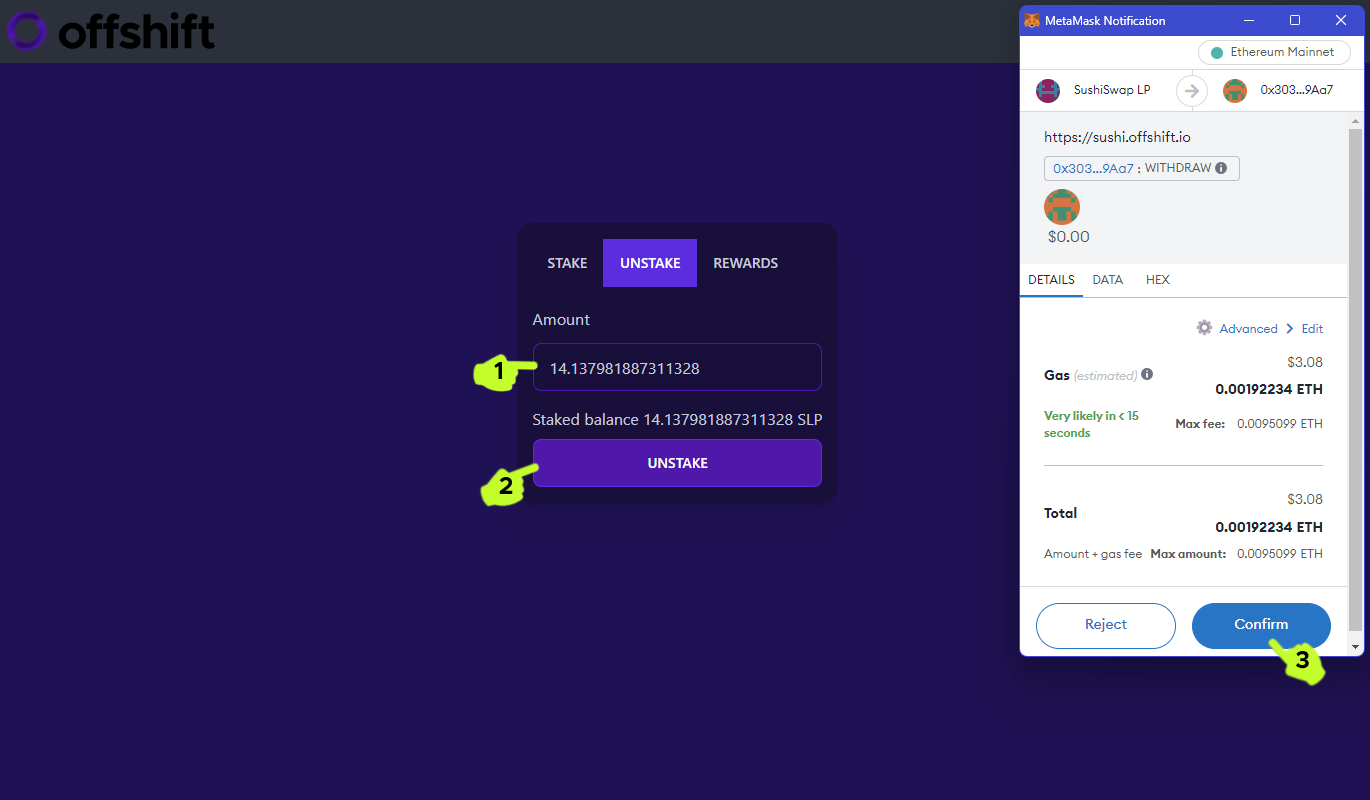
8. In the event you want to unstake, make sure you’ve harvested all available rewards, then navigate to the Unstake tab. Enter the amount of SLP you’d like to unstake in the Amount box, then click Unstake and Confirm in MetaMask.
To withdraw liquidity from the SushiSwap pool completely, make sure you’ve harvested all available rewards and unstaked your SLP from the Offshift dashboard, then proceed to the next step.
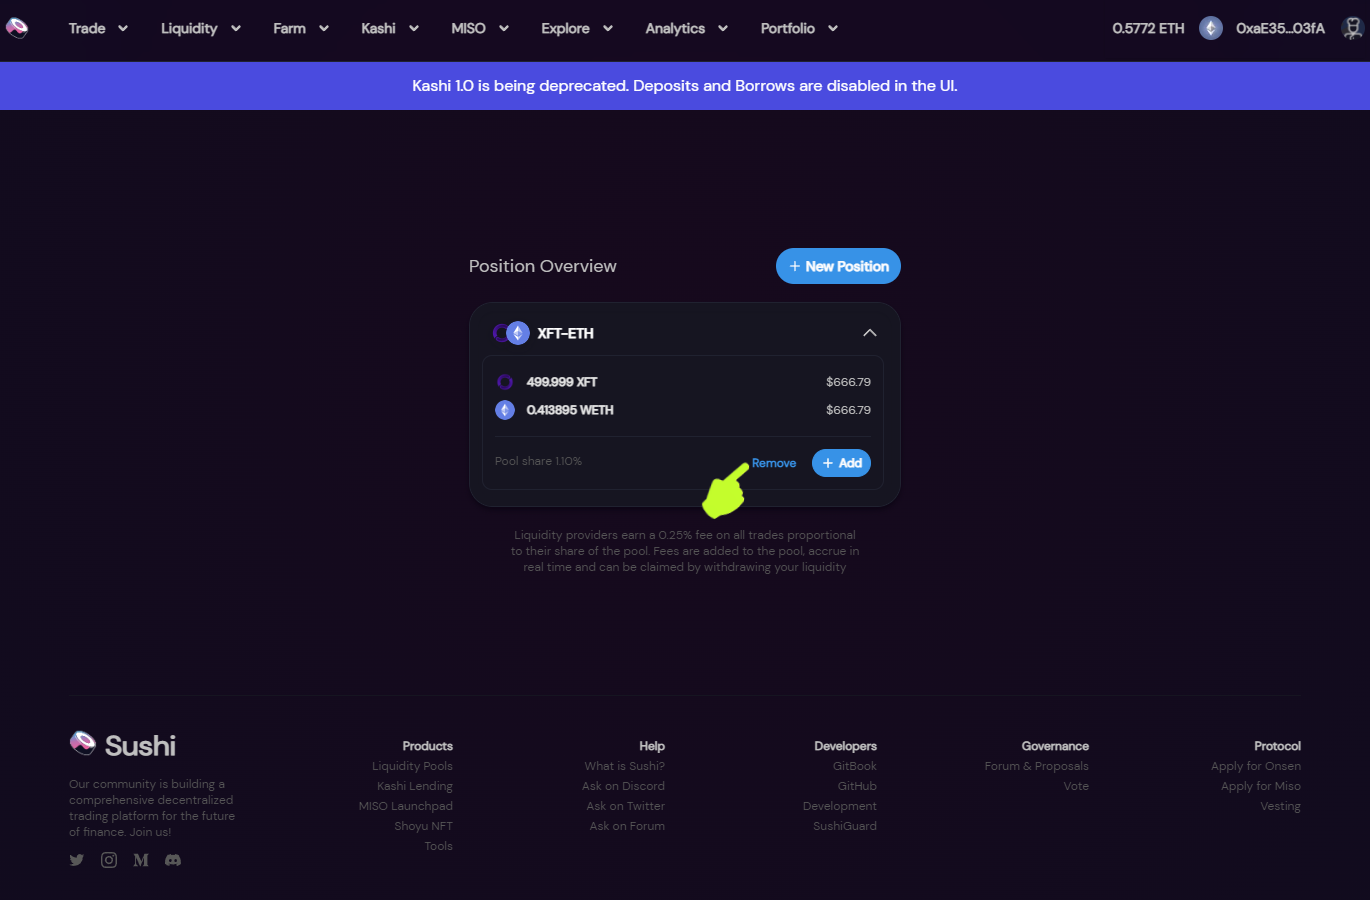
9. Navigate to the SushiSwap Position Overview page.and connect your wallet. Click your XFT-ETH position to expand, then click Remove.
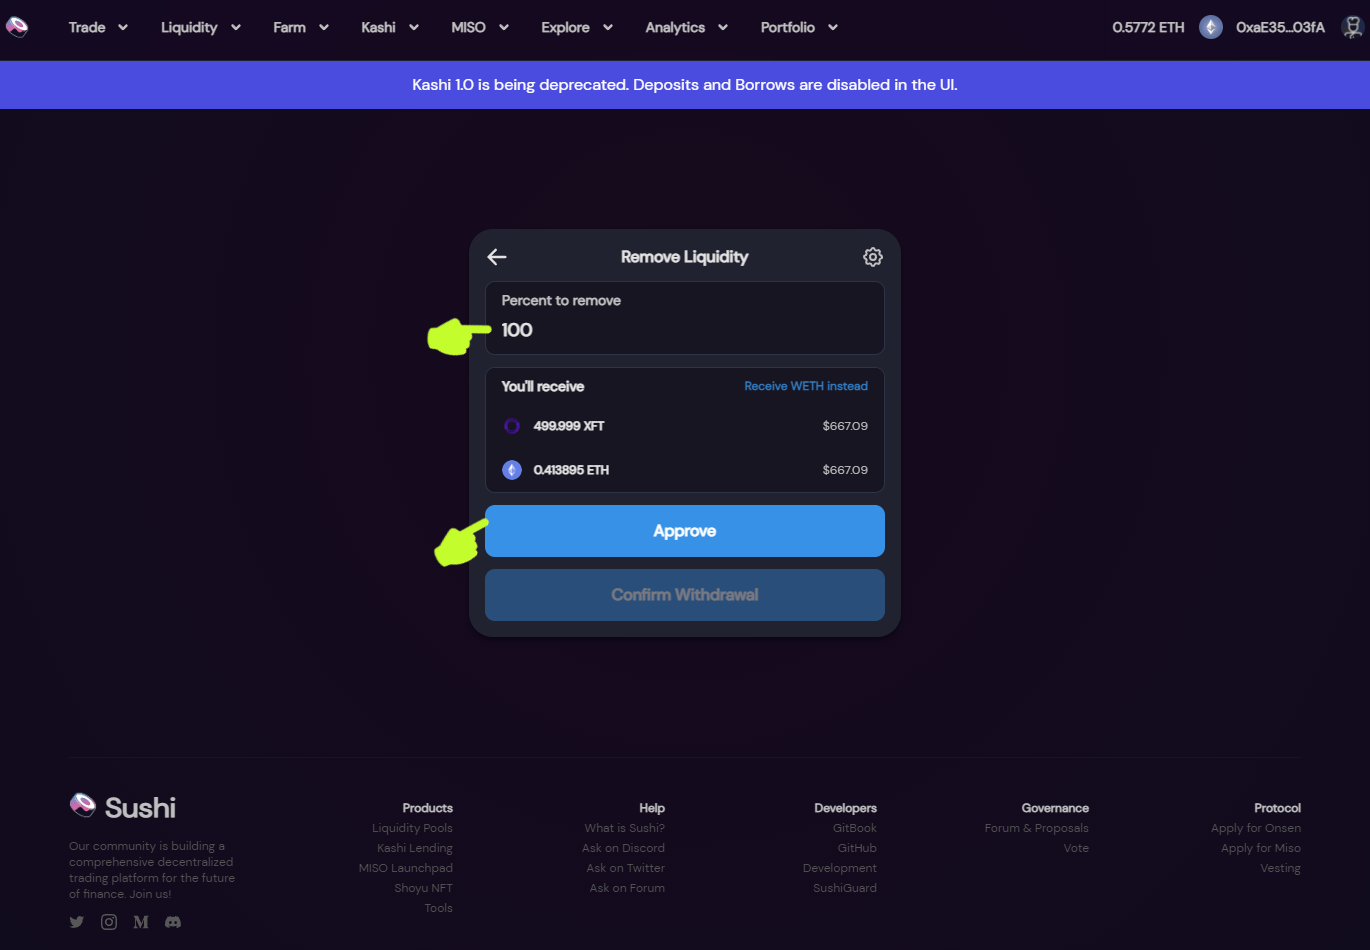
10. Enter the Percent to Remove and then click Approve.
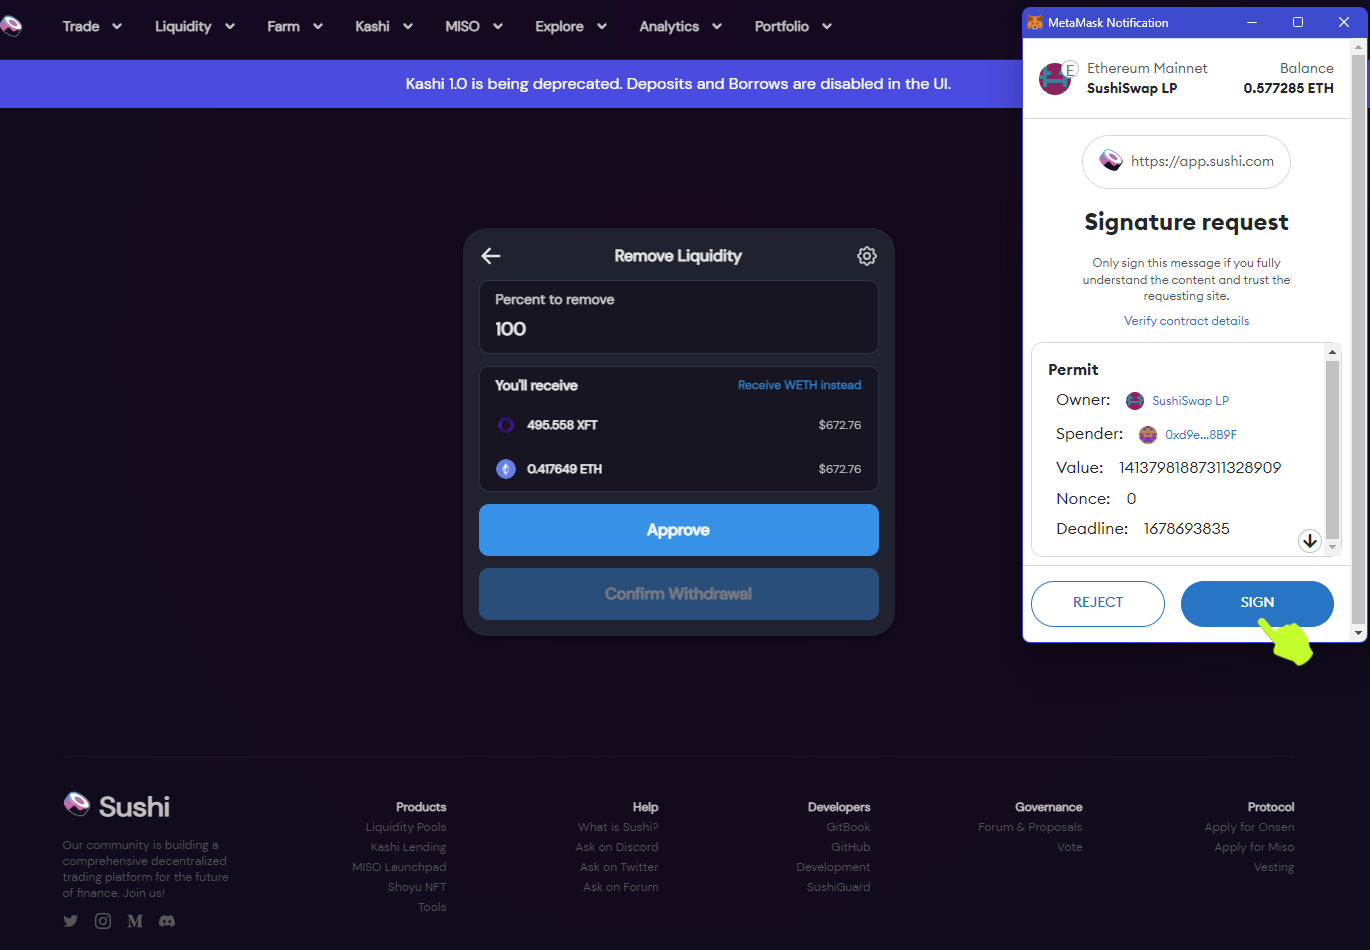
11. When Metamask opens, click Sign.
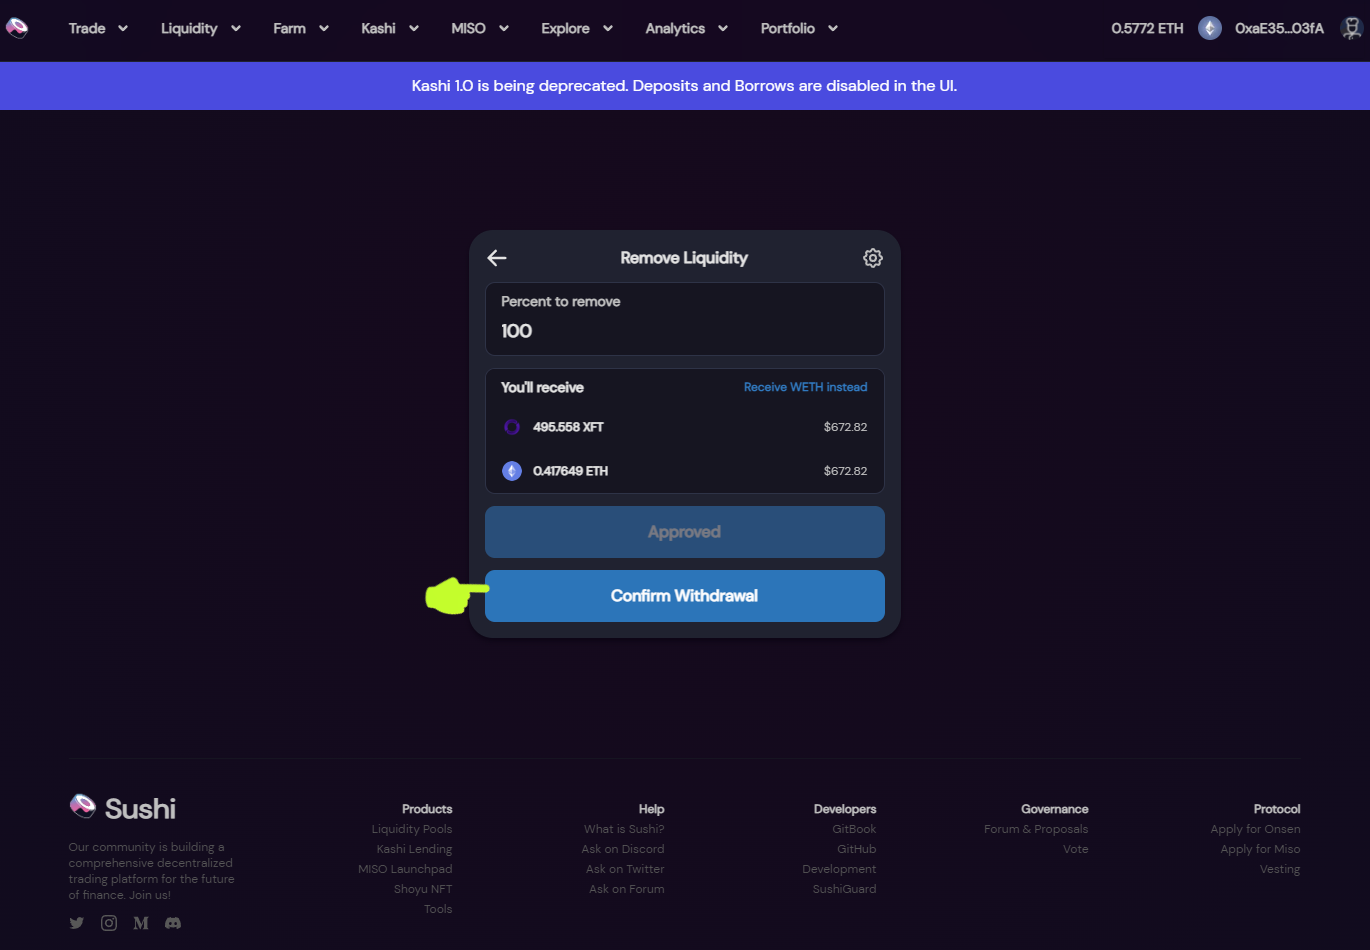
12. Click Confirm Withdrawal on the SushiSwap dash.
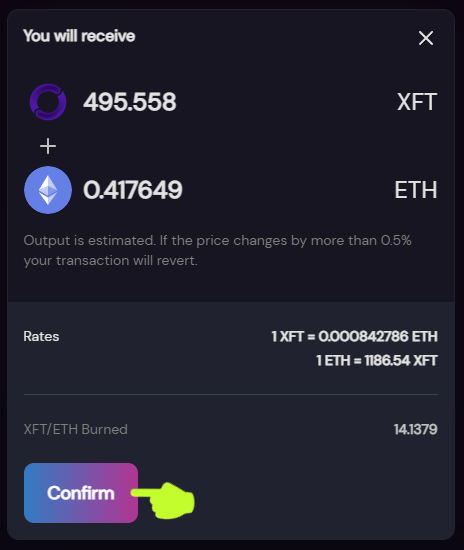
13. A SushiSwap confirmation will pop up. Click Confirm.
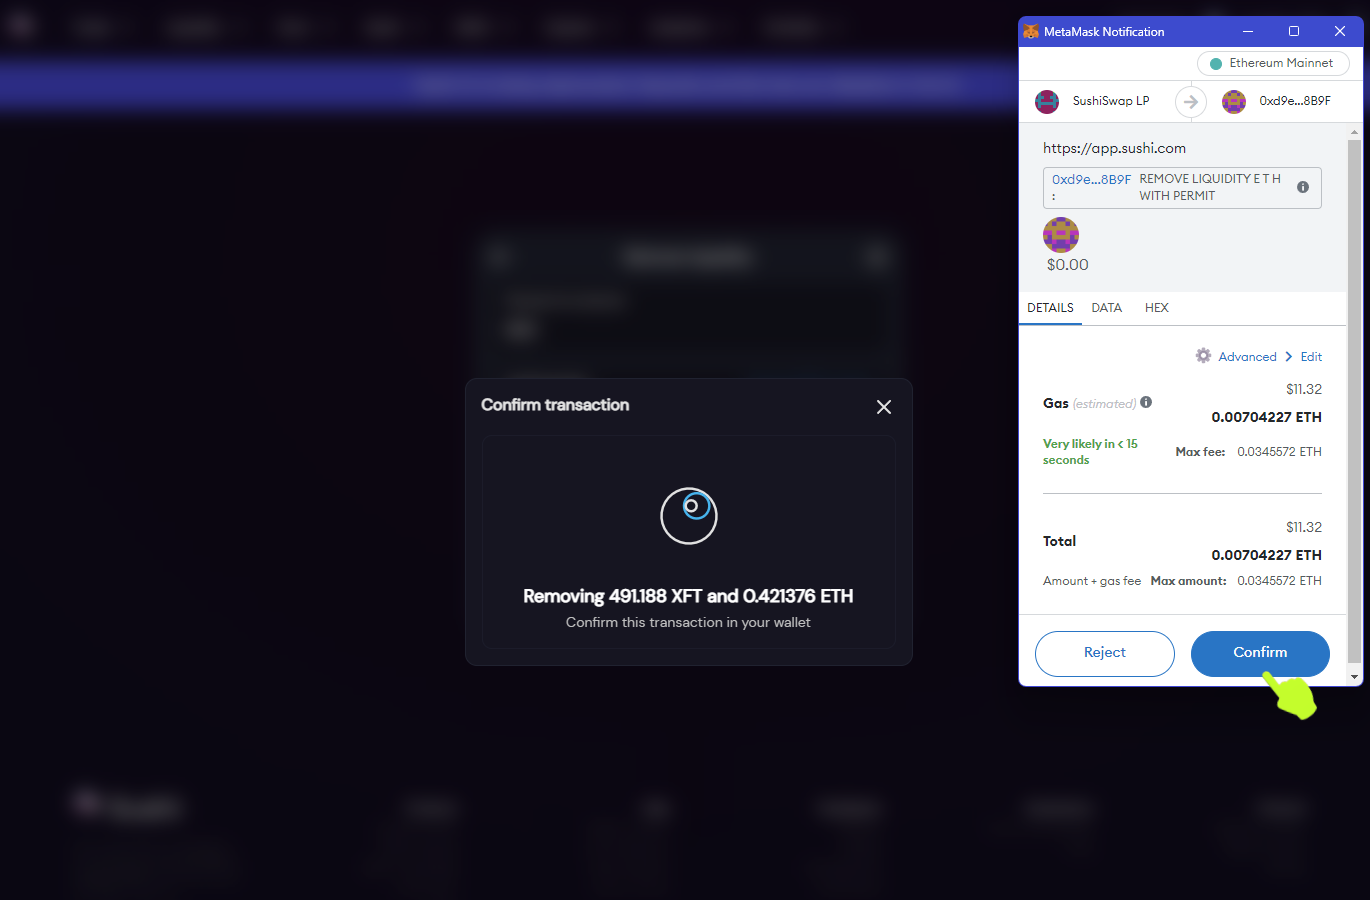
14. Finally, Confirm in MetaMask to withdraw your XFT and ETH.
That concludes the SushiSwap walkthrough. If you have any questions or run into any issues, please reach out in the official Offshift Telegram, where someone from the team or community will gladly try to assist.
(Continued from Uniswap section)
For more information on providing liquidity at set ranges, the following resources can be a good starting point.
Uniswap Labs: How to provide liquidity on Uniswap V3
Uniswap Labs: Can I provide liquidity over the full range on V3?
Uniswap Docs: Concentrated Liquidity
If, after familiarizing yourself with the associated risks, you choose to provide anonUSD/ETH liquidity over a set range through Uniswap’s frontend, and to stake the position yourself by interacting directly with the contract, you can follow these steps:
1. Follow the Uniswap Guide, and add liquidity through Uniswap’s frontend using the set price range of your choice.
2. Navigate to the Write Contract tab on the NonfungiblePositionManager Etherscan page.
3. Click Connect to Web3 and connect your wallet.
4. Scroll down to the safeTransferFrom
function in box 11, and enter the following:
from: (your eth address)
to: 0xe34139463bA50bD61336E0c446Bd8C0867c6fE65
tokenId: (your 6-digit UniswapV3:PositionsNFT token ID)
5. When you’ve entered all the above information into box 11, click the blue Write button, then approve the transaction in MetaMask.
6. Navigate to the Write Contract tab on the Uniswap v3 Staker Etherscan page.
7. Click Connect to Web3 and connect your wallet.
8. Scroll down to the stakeToken
function in box 6, and enter the following:
rewardToken: 0x76BC677d444f1E9d57dAf5187ee2b7dC852745aE
pool: 0x12DED3D75fAE8B27Cd7f2B1A469Fe088a3711DdE
startTime: 1677535200
endTime: 1704067199
refundee: 0x45A2498da5bB1BC8e66444e714A2F251B64e18a4
tokenId: (your 6-digit UniswapV3:PositionsNFT token ID)
9. When you’ve entered all the above information into box 6, click the blue Write button, then approve the transaction in MetaMask.
You can claimRewards
, unstakeToken
, and withdrawToken
on the same Etherscan page, using the info in step three as necessary.